How to Add Two-Factor Authentication with Node.js and Express
Two-factor authentication refers to a pattern of users needing both something they know, like a password, and something they have, like a verification token from a mobile device.
This tutorial will cover how to implement a verification token system with the Vonage Verify API and Express.js.
The application will have three pages. An initial page that asks for a mobile number, a page where users provide the code sent to them, and finally, a page which they'll see if their code was correct and the verification successful.

The finished code example is available at https://github.com/nexmo-community/verify-node-express
Prerequisites
- Node.js installed on your machine
Vonage API Account
To complete this tutorial, you will need a Vonage API account. If you don’t have one already, you can sign up today and start building with free credit. Once you have an account, you can find your API Key and API Secret at the top of the Vonage API Dashboard.
This tutorial also uses a virtual phone number. To purchase one, go to Numbers > Buy Numbers and search for one that meets your needs.
Set Up
Create a new directory and open it in a terminal. Run npm init -y to create a package.json file and install dependencies with npm install express body-parser nunjucks nexmo.
Create an index.js file and set up the dependencies:
const app = require('express')()
const bodyParser = require('body-parser')
const nunjucks = require('nunjucks')
const Nexmo = require('nexmo')

app.use(bodyParser.json())
app.use(bodyParser.urlencoded({ extended: false }))
nunjucks.configure('views', { express: app })

const nexmo = new Nexmo({
  apiKey: 'API KEY FROM DASHBOARD',
  apiSecret: 'API SECRET FROM DASHBOARD'
})

// Other code will go here

app.listen(3000)
Nunjucks allows data to be passed to templates using the {{ variable }} syntax. It is set up to automatically parse files in the views directory and is linked with the express application stored in app.
Create the Landing Page
Create a directory called views and an index.html file inside of it with the following content:
{{ message }}

<form method="post" action="verify">
  <input name="number" type="tel">
  <button>Get code</button>
</form>
Create a route in index.js to render this view:
app.get('/', (req, res) => {
  res.render('index.html', { message: 'Hello, world!' })
})
Run node index.js in your terminal and open localhost:3000 in your browser. Notice that the message is populated at the top of the page in place of the {{ message }} in the code.

Create a Verification Request
The form on index.html will send a POST request to /verify when submitted. Create a new route to handle this in index.js:
app.post('/verify', (req, res) => {
  nexmo.verify.request({
    number: req.body.number,
    brand: 'ACME Corp'
  }, (error, result) => {
    if(result.status != 0) {
      res.render('index.html', { message: result.error_text })
    } else {
      res.render('check.html', { requestId: result.request_id })
    }
  })
})
By default, workflow 1 is used, which sends an SMS, then calls to read out a code , and then another call. The final step will wait 5 minutes before the whole request expires. You can pass workflow_id as an option if you want to change this behavior.
The result will contain a status property - 0 means the action has been successful, and anything else means there has been an error - which is passed to the rendered index.html page. If successful check.html is rendered.
Check the Code
Create check.html in the views directory:
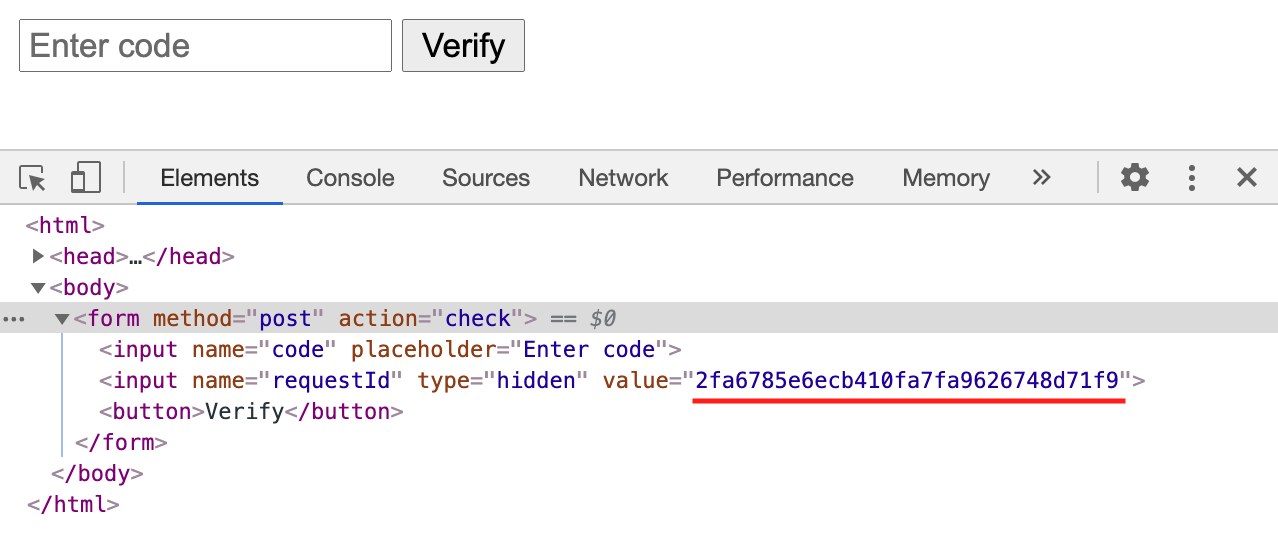
<form method="post" action="check">
  <input name="code" placeholder="Enter code">
  <input name="requestId" type="hidden" value="{{ requestId }}">
  <button>Verify</button>
</form>
As well as the code, the request ID is required to check if the code is correct. Using the same method as {{message}}, the value of the hidden field requestId is provided dynamically.

Like before, this will submit a POST request to the /check endpoint as this is provided in the action attribute.
Create a new endpoint in index.js:
app.post('/check', (req, res) => {
  nexmo.verify.check({
    request_id: req.body.requestId,
    code: req.body.code
  }, (error, result) => {
    if(result.status != 0) {
      res.render('index.html', { message: result.error_text })
    } else {
      res.render('success.html')
    }
  })
})
If the returned status is 0, the check has been successful and the verification is complete. Create a success.html file in the views folder to celebrate:
<h1>🎉 Success! 🎉</h1>
What Next?
Congratulations on implementing 2FA. Hopefully, you'll agree that it was an enjoyable experience.
In production, there are some additional considerations you'll want to factor in:
- More robust handling of errors and non-zero status codes.
- Providing the ability to cancel ongoing verifications.
- Allowing users to indicate their preference between SMS and call-based code delivery.
- Use the Vonage Number Insight API to ensure only valid phone numbers are passed to the Verify API.
You can find the final project at https://github.com/nexmo-community/verify-node-express
As ever, if you need any support feel free to reach out in the Vonage Developer Community Slack. We hope to see you there.
