Using Apollo to Query GraphQL from Node.js
It's a common scenario—you built a quick prototype, it worked great, and now management wants it live yesterday. Maybe you were accessing a third-party GraphQL endpoint and now you're in a rush to get something out the door. One of your roadblocks? That endpoint doesn't provide CORS headers. No more calling it directly from your frontend JavaScript app.
Do you need to create an Express app with routes for each data set you need? No way! In this tutorial, we will use the Apollo client library within a Node.js Express app to provide a middleman to your third-party endpoint, without the need to rewrite your GraphQL queries and mutations.
In addition to Apollo, there are several NPM libraries, like lokka and express-graphql, that we could use to abstract our third-party endpoint. Each of these libraries have their pros and cons. We'll be using Apollo due to its popularity and the level of support it has as part of the Apollo Data Graph Platform.
Want to skip to the end? You can find all the source code for this tutorial on GitHub.
Getting Started
First, let's get all our files and dependencies in place. Create a folder called nodejs-apollo-client and open it in your terminal of choice.
Now run npm init in your terminal to initialize NPM in the directory. Then execute the script below to install the dependencies.
npm install --save npm i apollo-cache-inmemory apollo-client apollo-link-http express graphql graphql-tag node-fetch
Build a GraphQL Middleman
Create a new file named apollo.js. This file contains the real "meat" of our solution. It brokers requests between our Express application and the third-party GraphQL endpoint.
Let's start by copying the following snippet into that file.
const gql = require("graphql-tag");
const ApolloClient = require("apollo-client").ApolloClient;
const fetch = require("node-fetch");
const createHttpLink = require("apollo-link-http").createHttpLink;
const setContext = require("apollo-link-context").setContext;
const InMemoryCache = require("apollo-cache-inmemory").InMemoryCache;

const httpLink = createHttpLink({
  uri: "https://insights.opentok.com/graphql",
  fetch: fetch
});

const client = new ApolloClient({
  link: httpLink,
  cache: new InMemoryCache()
});
The client object is an Apollo client. Because we're running this code on the server-side, fetch isn't available to us. So we'll start by creating an HttpLink manually so we can inject node-fetch in place of the built-in browser fetch.
For our purposes, we'll use the InMemoryCache object to handle caching data, but in your production solution, you'll likely want to replace this with whatever caching solution you prefer.
Next, copy the snippet below into the apollo.js file.
const query = async (req, res) => {
  if (!req.body || !req.body.query) {
    res.sendStatus(500);
    return;
  }

  const query = gql(req.body.query);
  let variables = undefined;
  if (req.body.variables) {
    variables = JSON.parse(decodeURIComponent(req.body.variables));
  }

  try {
    const result = await client.query({
      query,
      variables
    });
    res.json(result);
  } catch (err) {
    console.log(err);
    res.sendStatus(500).send(JSON.stringify(err));
  }
};

const mutate = async (req, res) => {
  if (!req.body || !req.body.query) {
    res.sendStatus(500);
    return;
  }

  const query = gql(req.body.query);
  let variables = undefined;
  if (req.body.variables) {
    variables = JSON.parse(decodeURIComponent(req.body.variables));
  }

  try {
    const result = await client.mutate({
      query,
      variables
    });
    res.json(result);
  } catch (err) {
    console.log(err);
    res.sendStatus(500).send(JSON.stringify(err));
  }
};
These functions (query and mutate) take a request, pull query/mutate and variable information from the body, and then forward those parameters using the client object.
Finally, we create an apollo method and export it so we can use it in the Express workflow later. This function inspects the incoming request and forwards it to the appropriate (mutate or query) function.
const apollo = async (req, res, next) => {
  switch (req.method) {
    case "POST":
    case "PUT":
      await mutate(req, res);
      break;

    case "GET":
    default:
      await query(req, res);
  }

  next();
};


module.exports = apollo;
Take the Express Lane
Now that we've got our middleman built, let's plug it into an Express application. Create an index.js file and copy in the following:
const express = require("express");
const app = express();
const port = 3000;

const apollo = require("./apollo");

app.use(express.json());
app.use(apollo);

app.listen(port, () => console.log(`Example app listening on port ${port}!`));
This snippet will tell Express that you want to use JSON and insert our apollo function into the request life cycle. Essentially, every request to this Express application will now be processed by our middleman. So every GraphQL query and mutation will be forwarded on to the third-party endpoint and returned from your local server to your client of choice.
Handling Authentication
The example above can handle scenarios where you don't have to authenticate with the third-party endpoint, but what happens when we need to send custom headers with each request? As an example, let's use the Vonage Video Insights API GraphQL endpoint.
The Insights API is a GraphQL API that allows you to explore your session metadata at the project and session level. It requires requests to include a custom header of X-OPENTOK-AUTH with a JWT.
Prerequisites
First, you'll need a Vonage Video Account. If you don't have one already, create one for free.
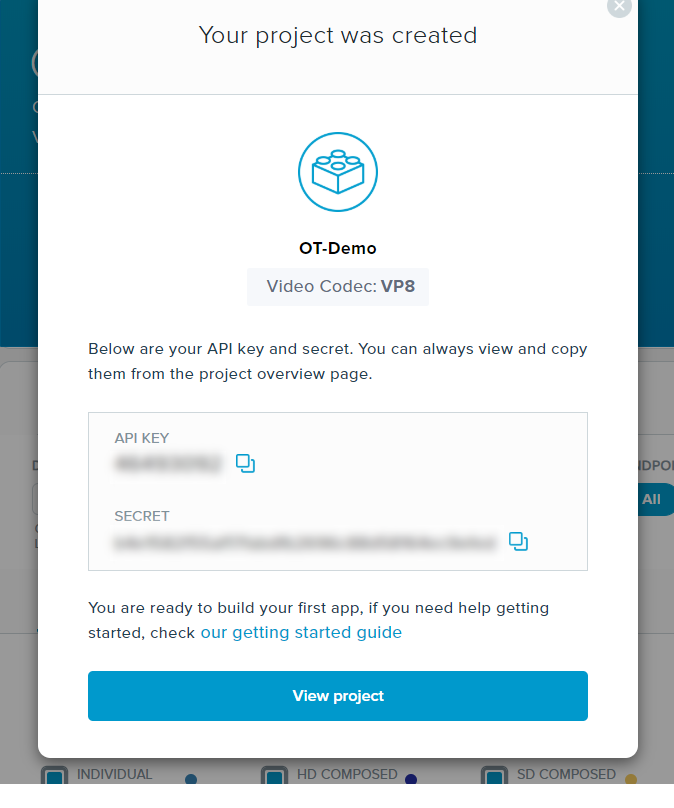
In your Vonage Video Account, click the 'Projects' menu and 'Create New Project'. Then click the 'Create Custom Project' button. Give your new project a name and press the 'Create' button. You can leave the preferred codec as 'VP8'.

Copy the API Key and Secret on this screen. We'll use it later to configure our authentication.
For the full experience, you'll need data in your Vonage Video account. Take a few minutes to walk through the Hello World Quick Start to build a real-time video application.
Configuration
Create a new file called config.js and paste the code below in it. Be sure to replace the values of the constants with the API Key and Secret you copied previously.
// Replace these values with those generated in your Vonage Video Account
const OPENTOK_API_KEY = "";
const OPENTOK_API_SECRET = "";

module.exports = { OPENTOK_API_KEY, OPENTOK_API_SECRET };
Generating Custom Headers
Now you'll want to generate a valid JWT to send in the header of each request. To do so, we'll need to add an NPM package. From your terminal, install the jsonwebtoken package.
npm install --save jsonwebtoken
Next, create a new file called auth.js and paste the following:
const JWT = require("jsonwebtoken");
const SECRETS = require("./config");

var now = Math.round(new Date().getTime() / 1000);
var later = now + 120;
const payload = {
  iss: SECRETS.OPENTOK_API_KEY,
  ist: "project",
  iat: now,
  exp: later
};

const getHeaders = () => {
  const token = JWT.sign(payload, SECRETS.OPENTOK_API_SECRET);
  const headers = {
    "X-OPENTOK-AUTH": token
  };
  return headers;
};

module.exports = getHeaders;
This code exports a method that will create our custom headers object with the necessary X-OPENTOK-AUTH parameter and attached JWT token.
Putting It All Together
Now that we can generate headers appropriately, we'll need to update our apollo.js code to use them. Open the apollo.js file and add the following snippet:
const getHeaders = require("./auth");

const authLink = setContext((_, { headers }) => {
  const authHeaders = getHeaders();
  // return the headers to the context so httpLink can read them
  return {
    headers: authHeaders
  };
});
Next, replace the constructor for the client constant with the following:
const client = new ApolloClient({
  link: authLink.concat(httpLink),
  cache: new InMemoryCache()
});
Let's Run a Query
We can now start up the app in the terminal by running node index.js. Then we can send a GraphQL query to http://localhost:3000. Send the following query and variables to retrieve information about the sessions you created earlier.
Query
query ($PROJECT_ID: Int!, $START_TIME: Date!) {
    project(projectId: $PROJECT_ID) {
      projectData(
      start: $START_TIME,
      interval: AUTO,
      sdkType: [JS, IOS, ANDROID],
      groupBy: [SDK_TYPE]
          ) {
        resources {
          sdkType
          intervalStart
          intervalEnd
          usage {
            streamedPublishedMinutes
            streamedSubscribedMinutes
          }
        }
      }
    }
}
Variables
{
    "PROJECT_ID": {OPENTOK API KEY},
    "START_TIME": "2020-01-01T08:00:00.000Z"
}
Be sure to replace the
{OPENTOK API KEY}above with your actual API Key.
You should receive a result similar to below.
{
    "data": {
        "project": {
            "projectData": {
                "resources": [
                    {
                        "sdkType": "JS",
                        "intervalStart": "2020-02-01T08:00:00.000Z",
                        "intervalEnd": "2020-02-29T08:00:00.000Z",
                        "usage": {
                            "streamedPublishedMinutes": 898.6833333333332,
                            "streamedSubscribedMinutes": 1121.0166666666664,
                            "__typename": "Usage"
                        },
                        "__typename": "Metric"
                    },
                    {
                        "sdkType": "JS",
                        "intervalStart": "2020-03-01T08:00:00.000Z",
                        "intervalEnd": "2020-03-08T08:00:00.000Z",
                        "usage": {
                            "streamedPublishedMinutes": 97.11666666666667,
                            "streamedSubscribedMinutes": 12.766666666666666,
                            "__typename": "Usage"
                        },
                        "__typename": "Metric"
                    }
                ],
                "__typename": "ProjectData"
            },
            "__typename": "Project"
        }
    },
    "loading": false,
    "networkStatus": 7,
    "stale": false
}
Be sure to check out the Vonage Video API Explorer (you'll need to be logged in to your Vonage Video account) to review the Insights API schema and learn about other data that is available to you.