Send WhatsApp and SMS Messages from Marketo
Vonage, Whatsapp, and SMS make it easy to leverage text messaging applications for customer outreach, appointment reminders, and mobile marketing. Vonage Messages API supports native app features and multimedia messaging—including video, audio, and geolocation—so your brand can deliver a more engaging user experience. You can use Messages API to help your business to get in touch with customers on the channel that's most convenient for them. Or, you can send a notification that surprise and delight your users, such as reminders, booking confirmation, etc.
In this walkthrough, we are going to integrate the Vonage Messages API in the Marketo Platform. For those of you that are not familiar with the tool, Marketo is SaaS-based marketing automation software built to help organizations automate and measure marketing engagement, tasks, and workflows.
Marketo lets you centralize all your digital marketing campaign emails, landing pages, online forms, marketing materials, plus a broad variety of drag and drop workflows that let you segment your database and push your marketing leads to various campaigns and programs so you can help them move down the marketing and sales funnel, and become customers.
Now Marketo users can not only interact with customers globally on the world’s most popular messaging app but they can create marketing flows where their messages will fallback to other channels like good old reliable SMS.
Building the Webhook in Marketo
The demo walks through setting up webhook in Marketo and connects them to Marketo Smart Campaigns. The scenario is:
- Create the webhook into Marketo Integration Webhook both for Whatsapp and SMS.
- Create a Smart Campaign in Marketo
- Connect the webhook to a user action. For example, when a user fills out a form, he receives the message via Whatsapp.
Step 1
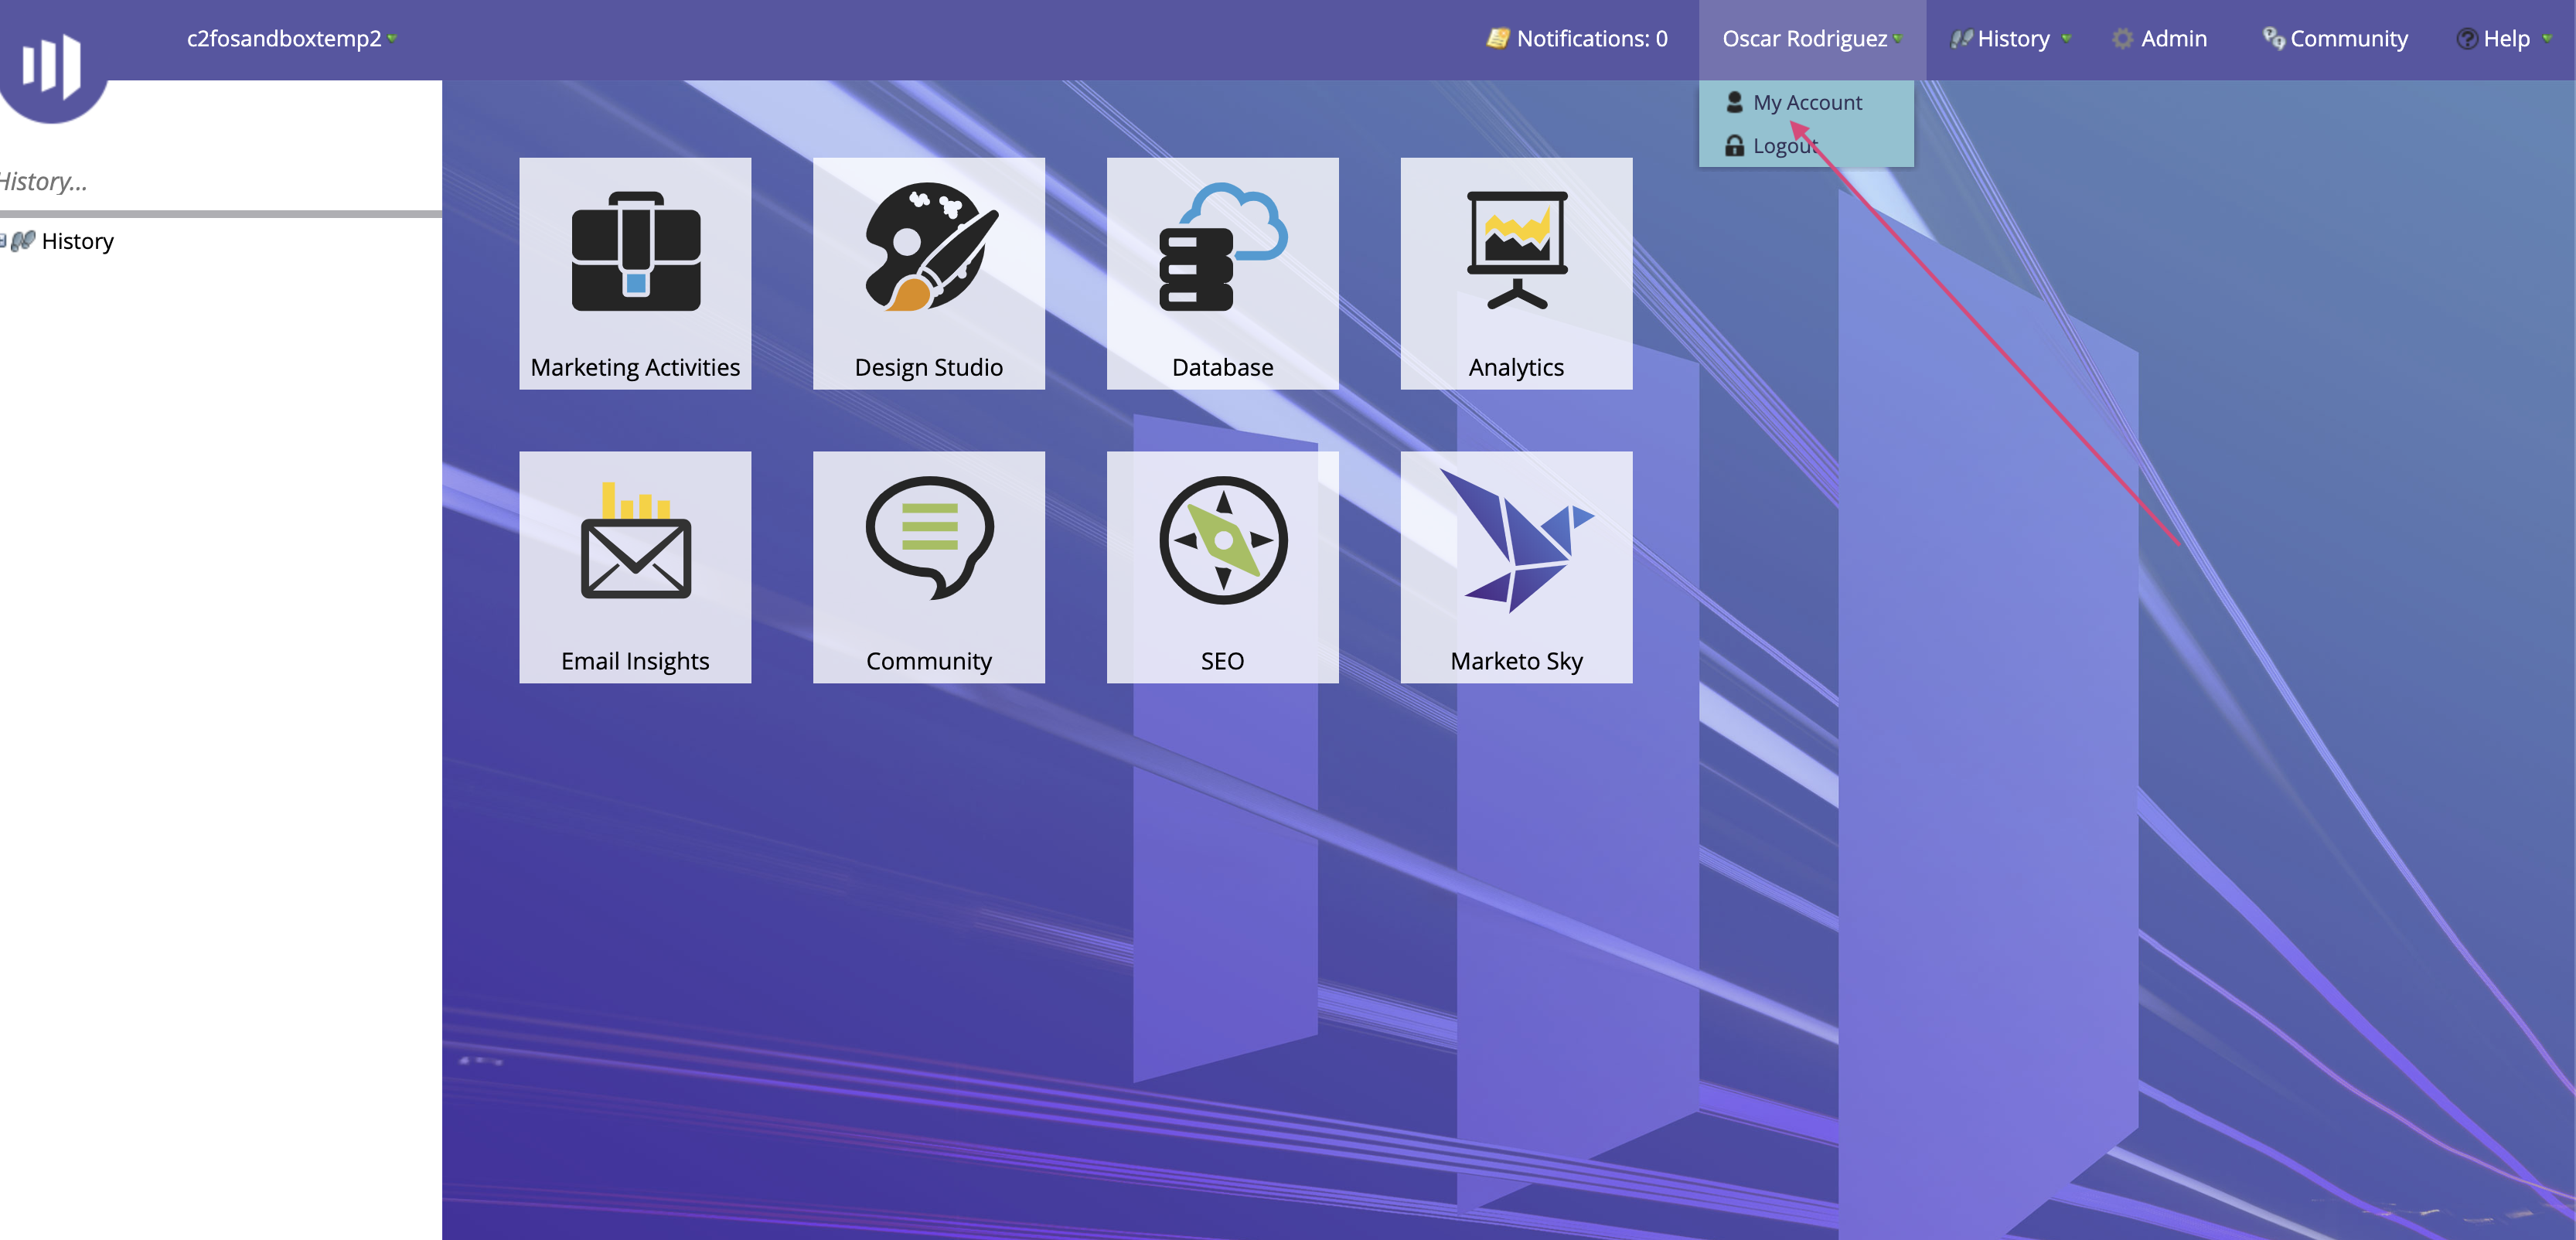
Log in to Marketo and navigate to My Account under Admin.
Step 2
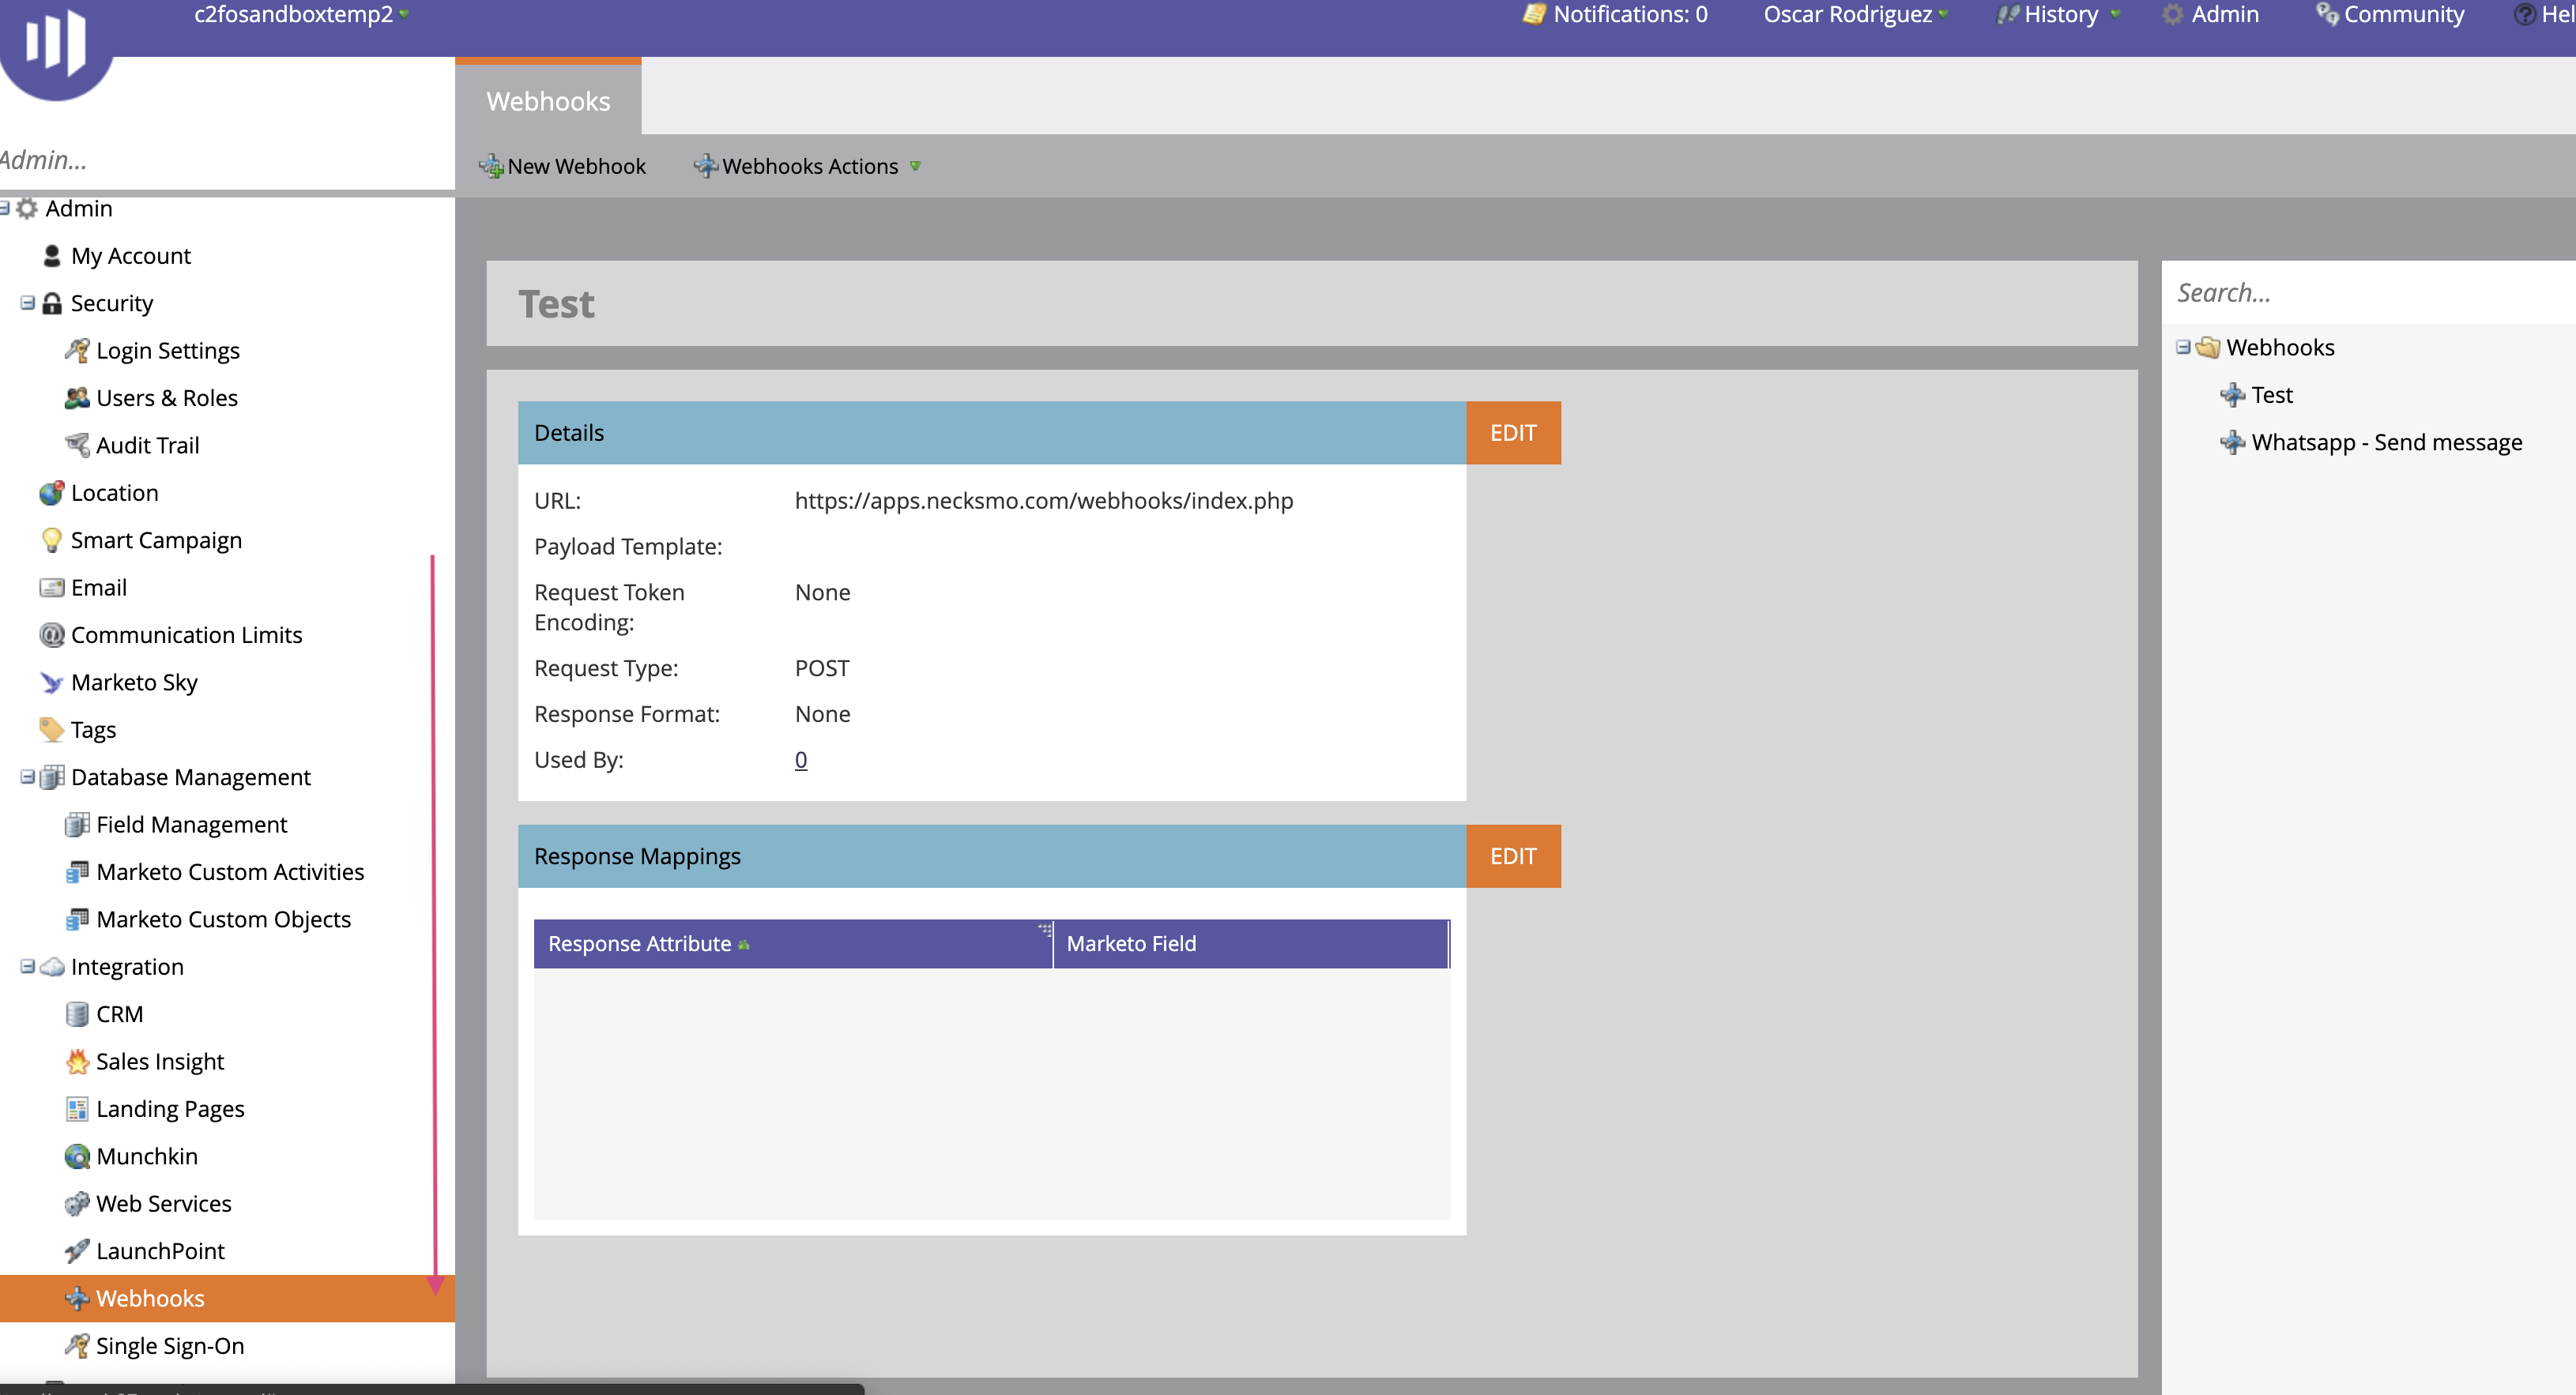
In the Admin section, click on Webhooks on the left-hand side. Create a new Webhook by clicking New Webhook
Step 3
Compile the name and description field.
Put the following parameters:
- URL:
https://api.nexmo.com/v0.1/messages - Request Type:
POST - Example body: be sure to replace the
tofield with your phone number. Use a WhatsApp Template for the first message to your customer, otherwise, the message will be refused by Whatsapp. For details, Nexmo Messages WA - Concepts.
{
  "to": {
    "type": "whatsapp",
    "number": "{{lead.Phone Number:default=edit me}}"
  },
  "from": { "type": "whatsapp", "number": "447418342149" },
  "message": {
    "content": {
      "type": "template",
      "template": {
        "name": "whatsapp:hsm:technology:nexmo:simplewelcome",
        "parameters": [
          {
            "default": "Nexmo {{lead.First Name:default=Jon Doe}}"
          },
          {
            "default": "interact with us over whatsapp. The campaignID is {{campaign.id:default=Campaign Id}}"
          }
        ]
      }
    }
  }
}
- Request Token Encoding: None
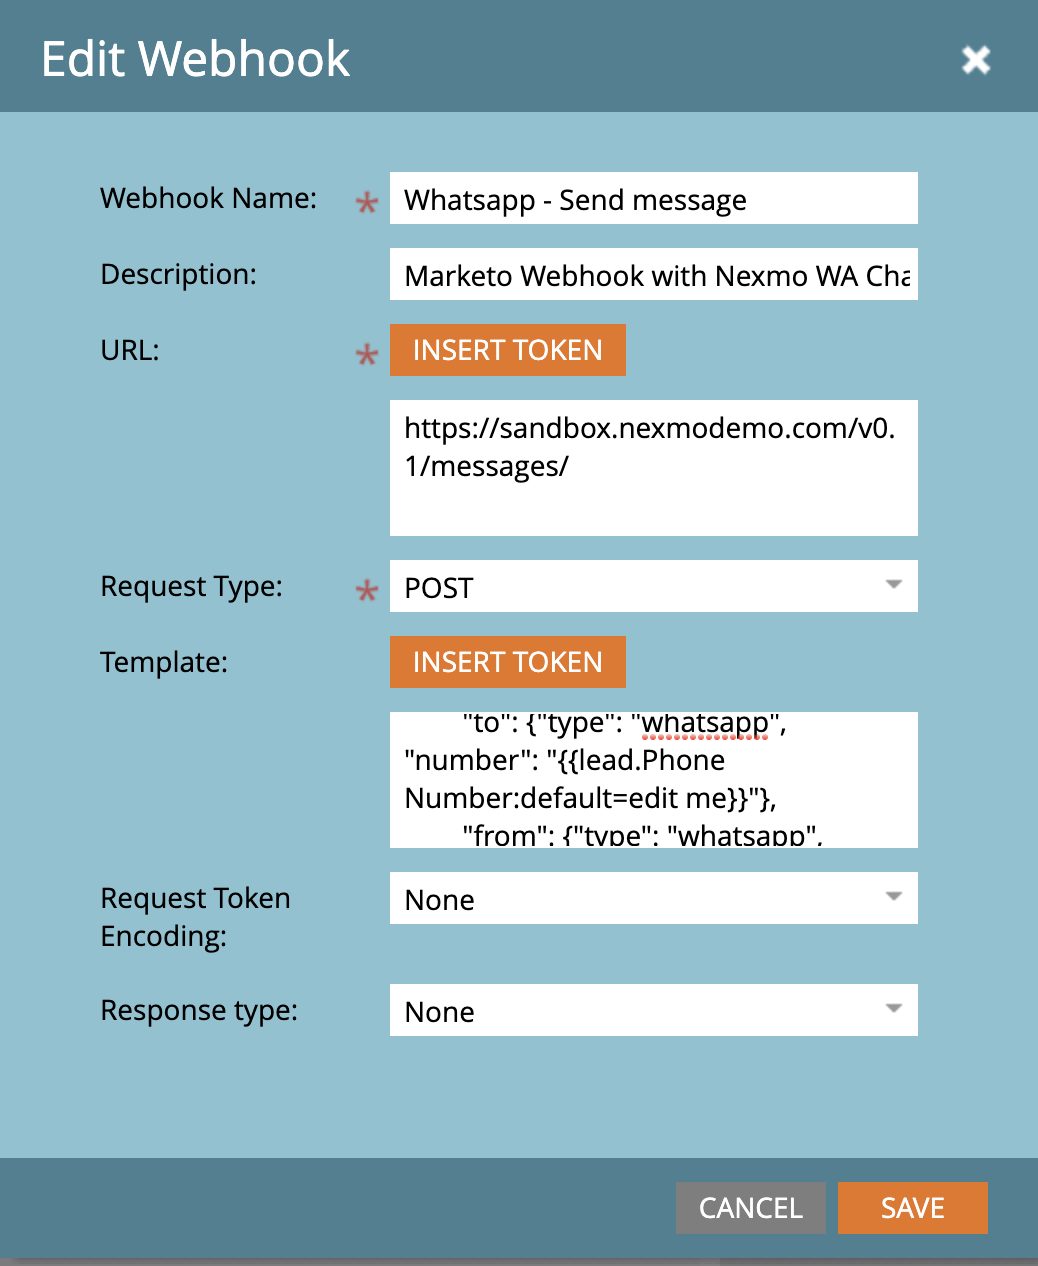
Note: Using the INSERT TOKEN button, you can also use tokens in the messages body sent via Whatsapp. In the example above, I used campaign id in the message body.
Lastly, select Webhooks Actions --> Set Custom Header and put Authorization: Basic base64(API_KEY:API_SECRET) and Content-Type: application/json.
If your API key was aaa012 and your API secret was abc123456789, you would concatenate the key and secret with a : (colon) symbol and then encode them using Base64 encoding to produce a value like this:
Authorization: Basic YWFhMDEyOmFiYzEyMzQ1Njc4OQ==
For example, Authorization: Basic adj0qj30ajf0ajf0a==.
Check documentation HERE
Done!
SMS
Step 1
Log in to Marketo and navigate to My Account via Admin.

Step 2
In the Admin section, click on Webhooks on the left-hand side. Create a new Webhook by clicking New Webhook.

Step 3
Compile the name and description field.
Put the following parameters:
- URL:
https://api.nexmo.com/v0.1/messages - Request Type:
POST - Example body: be sure to replace
tofield with your phone number.
{
  "from": { "type": "sms", "number": "Nexmo" },
  "to": { "type": "sms", "number": "{{lead.Phone Number:default=edit me}}" },
  "message": {
    "content": {
      "type": "text",
      "text": "Hello {{lead.First Name:default=Jon Doe}} from Nexmo. The campaignID is {{campaign.id:default=Campaign Id}}"
    }
  }
}
- Request Token Encoding: None
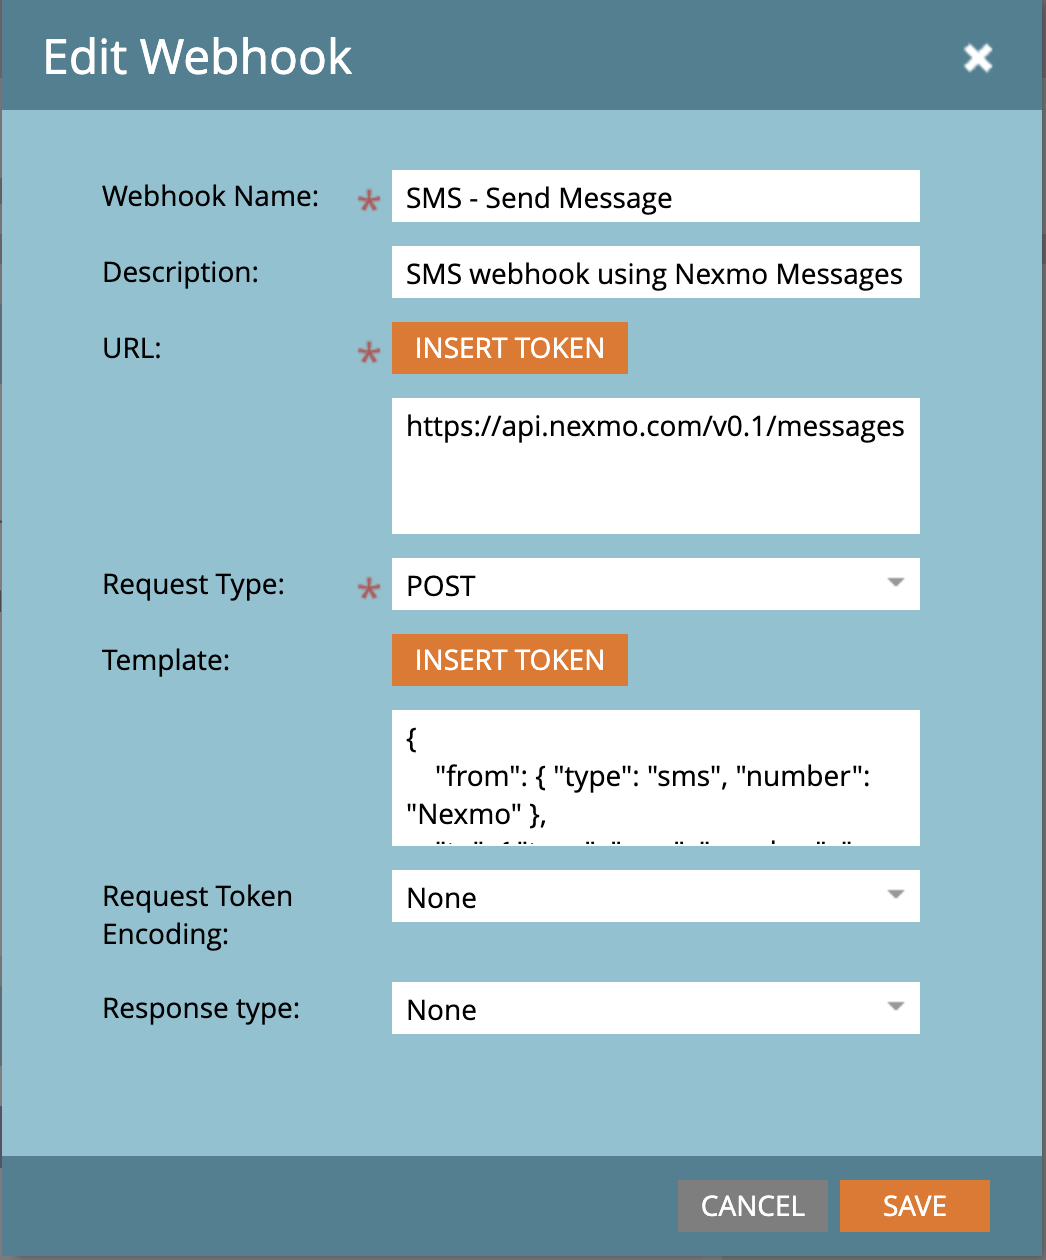
Note: Using the INSERT TOKEN button you can also use tokens in the messages body sent via Whatsapp. In the example above, I used campaign id in the message body.
Lastly, select Webhooks Actions --> Set Custom Header and put Authorization: Basic base64(API_KEY:API_SECRET) and Content-Type: application/json.
If your API key was aaa012 and your API secret was abc123456789, you would concatenate the key and secret with a : (colon) symbol and then encode them using Base64 encoding to produce a value like this:
Authorization: Basic YWFhMDEyOmFiYzEyMzQ1Njc4OQ==
For example, Authorization: Basic adj0qj30ajf0ajf0a==.
Check documentation HERE
Great!
We have successfully created webhooks for WhatsApp and SMS inside Marketo using Nexmo Messages API. The last step is to test them in a real scenario.
Marketo Smart Campaign
To test the webhooks we are going to create a Smart Campaign inside Marketo. Go to Marketing Activities:
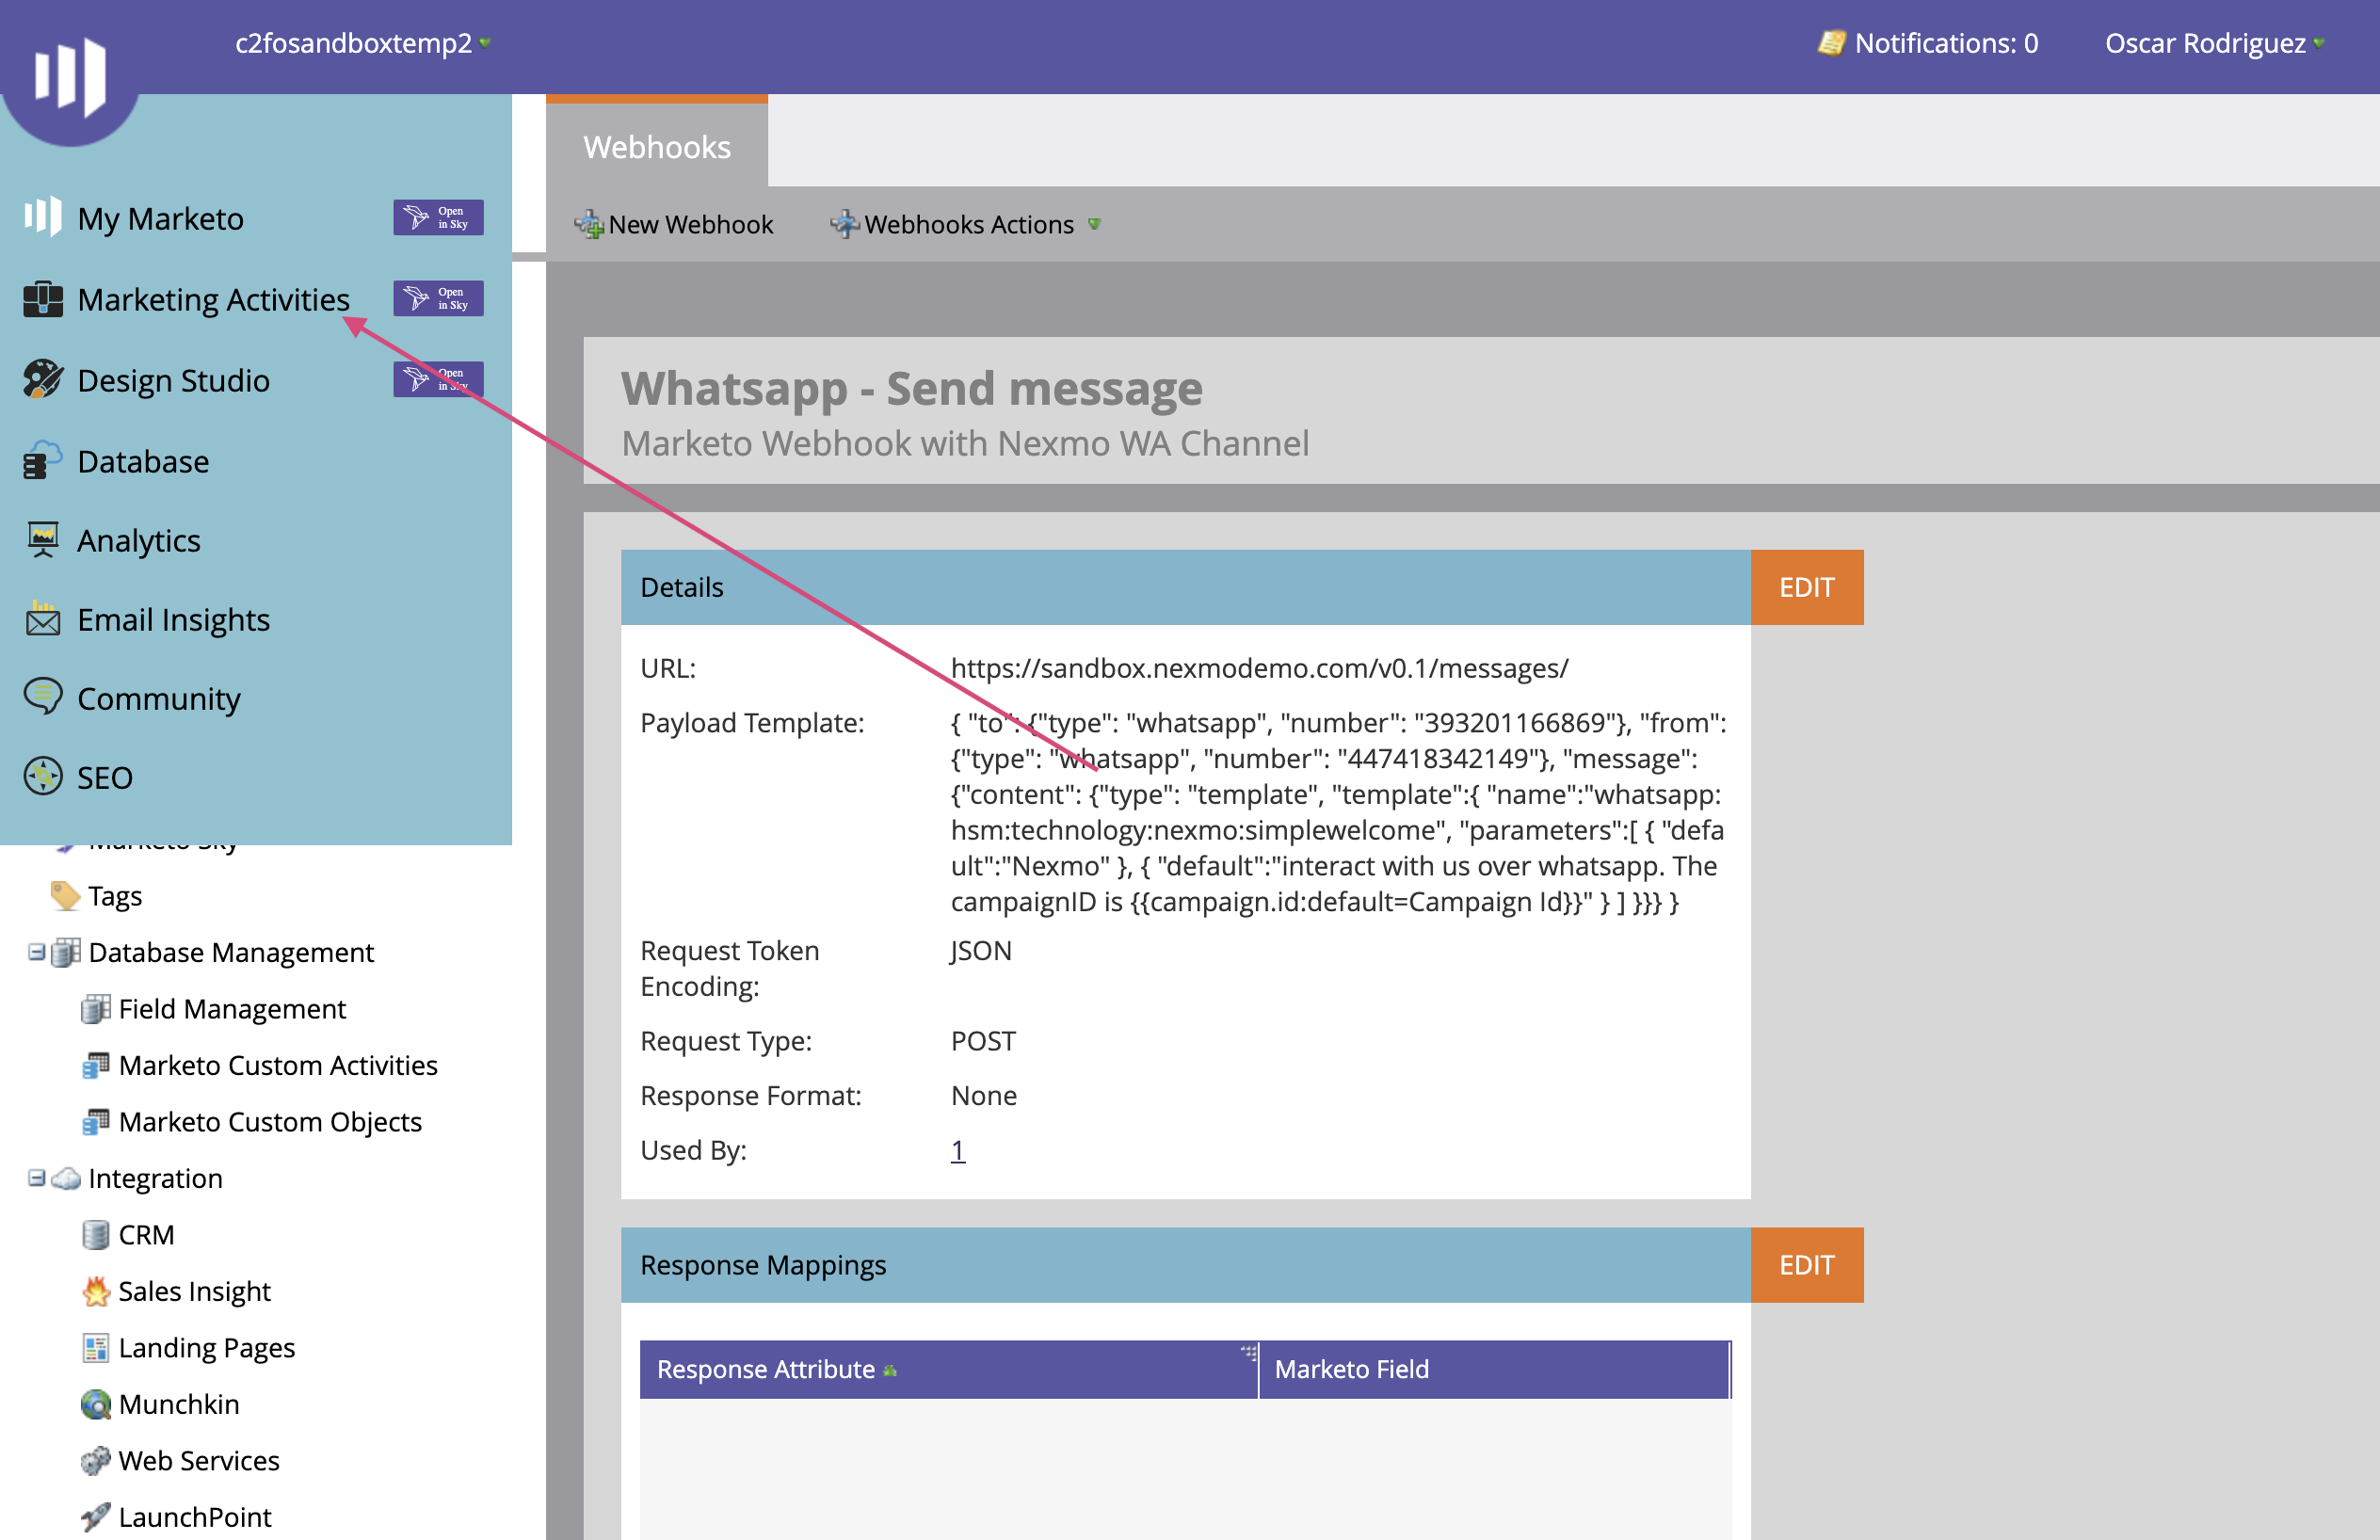
Create a New Campaign Folder. Then, select the folder and create a new Program.
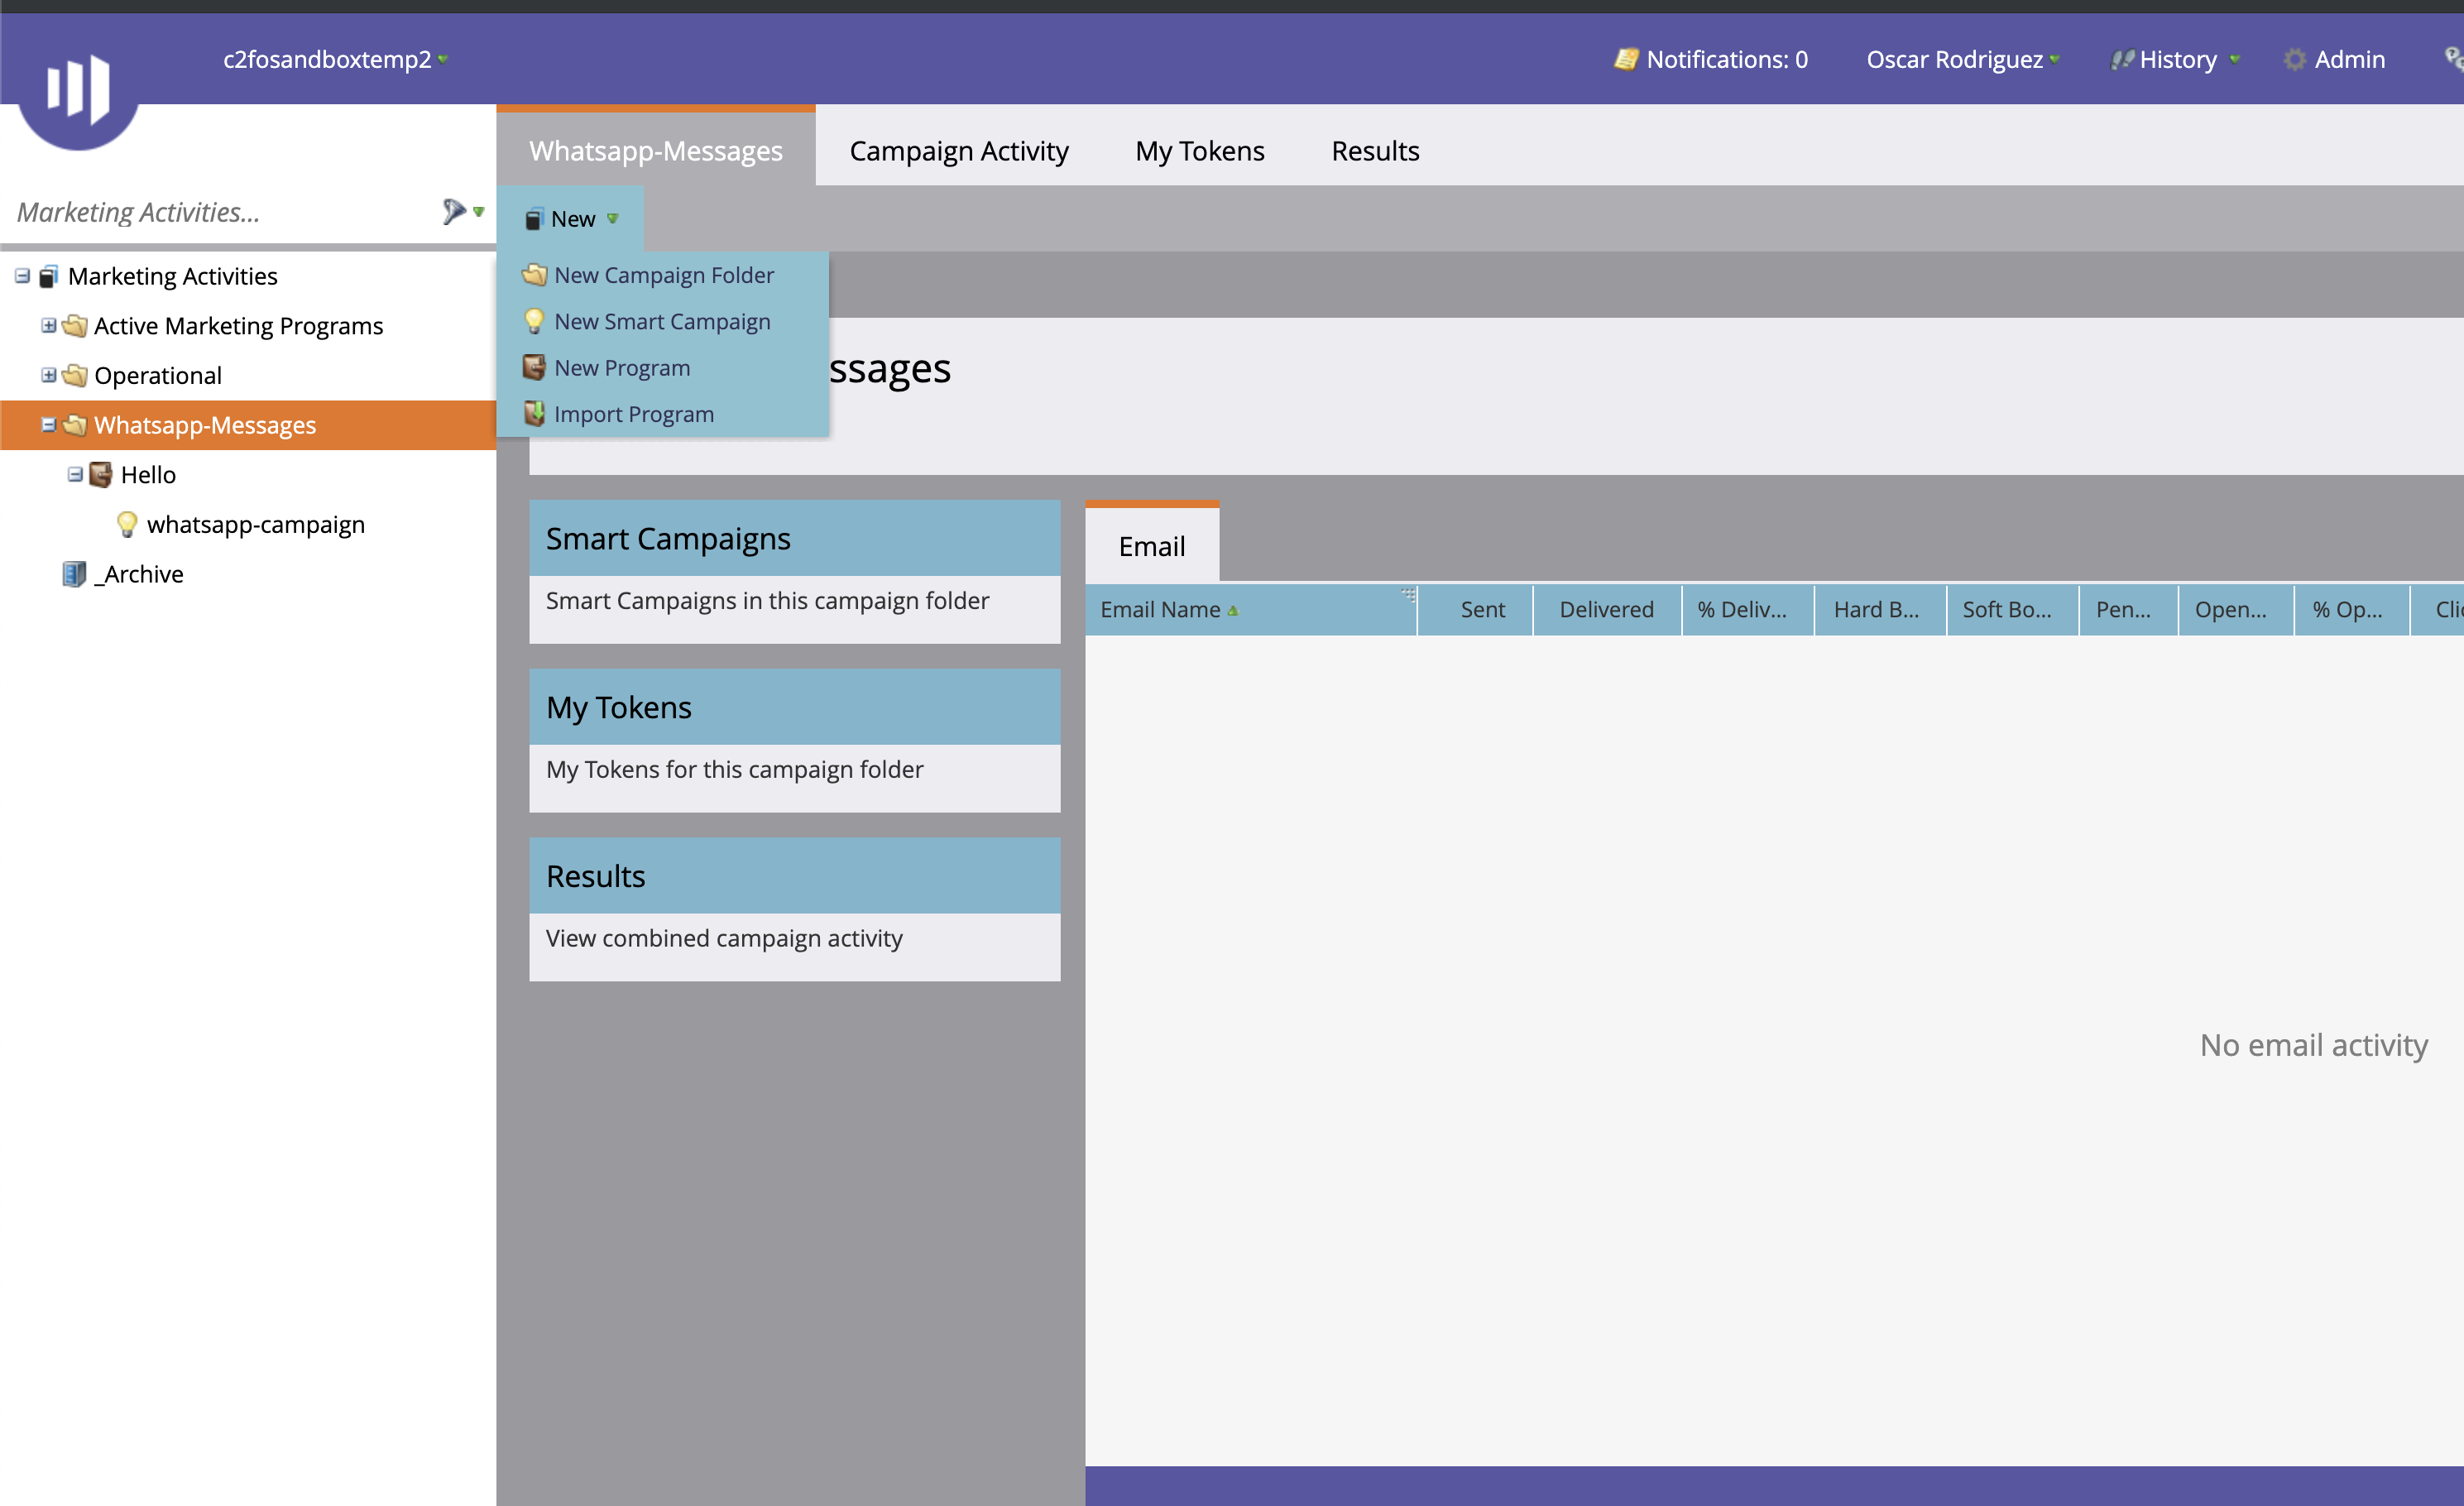
Create a new Smart Campaign. Select the Smart List tab and pick a condition that will trigger the Webhook.
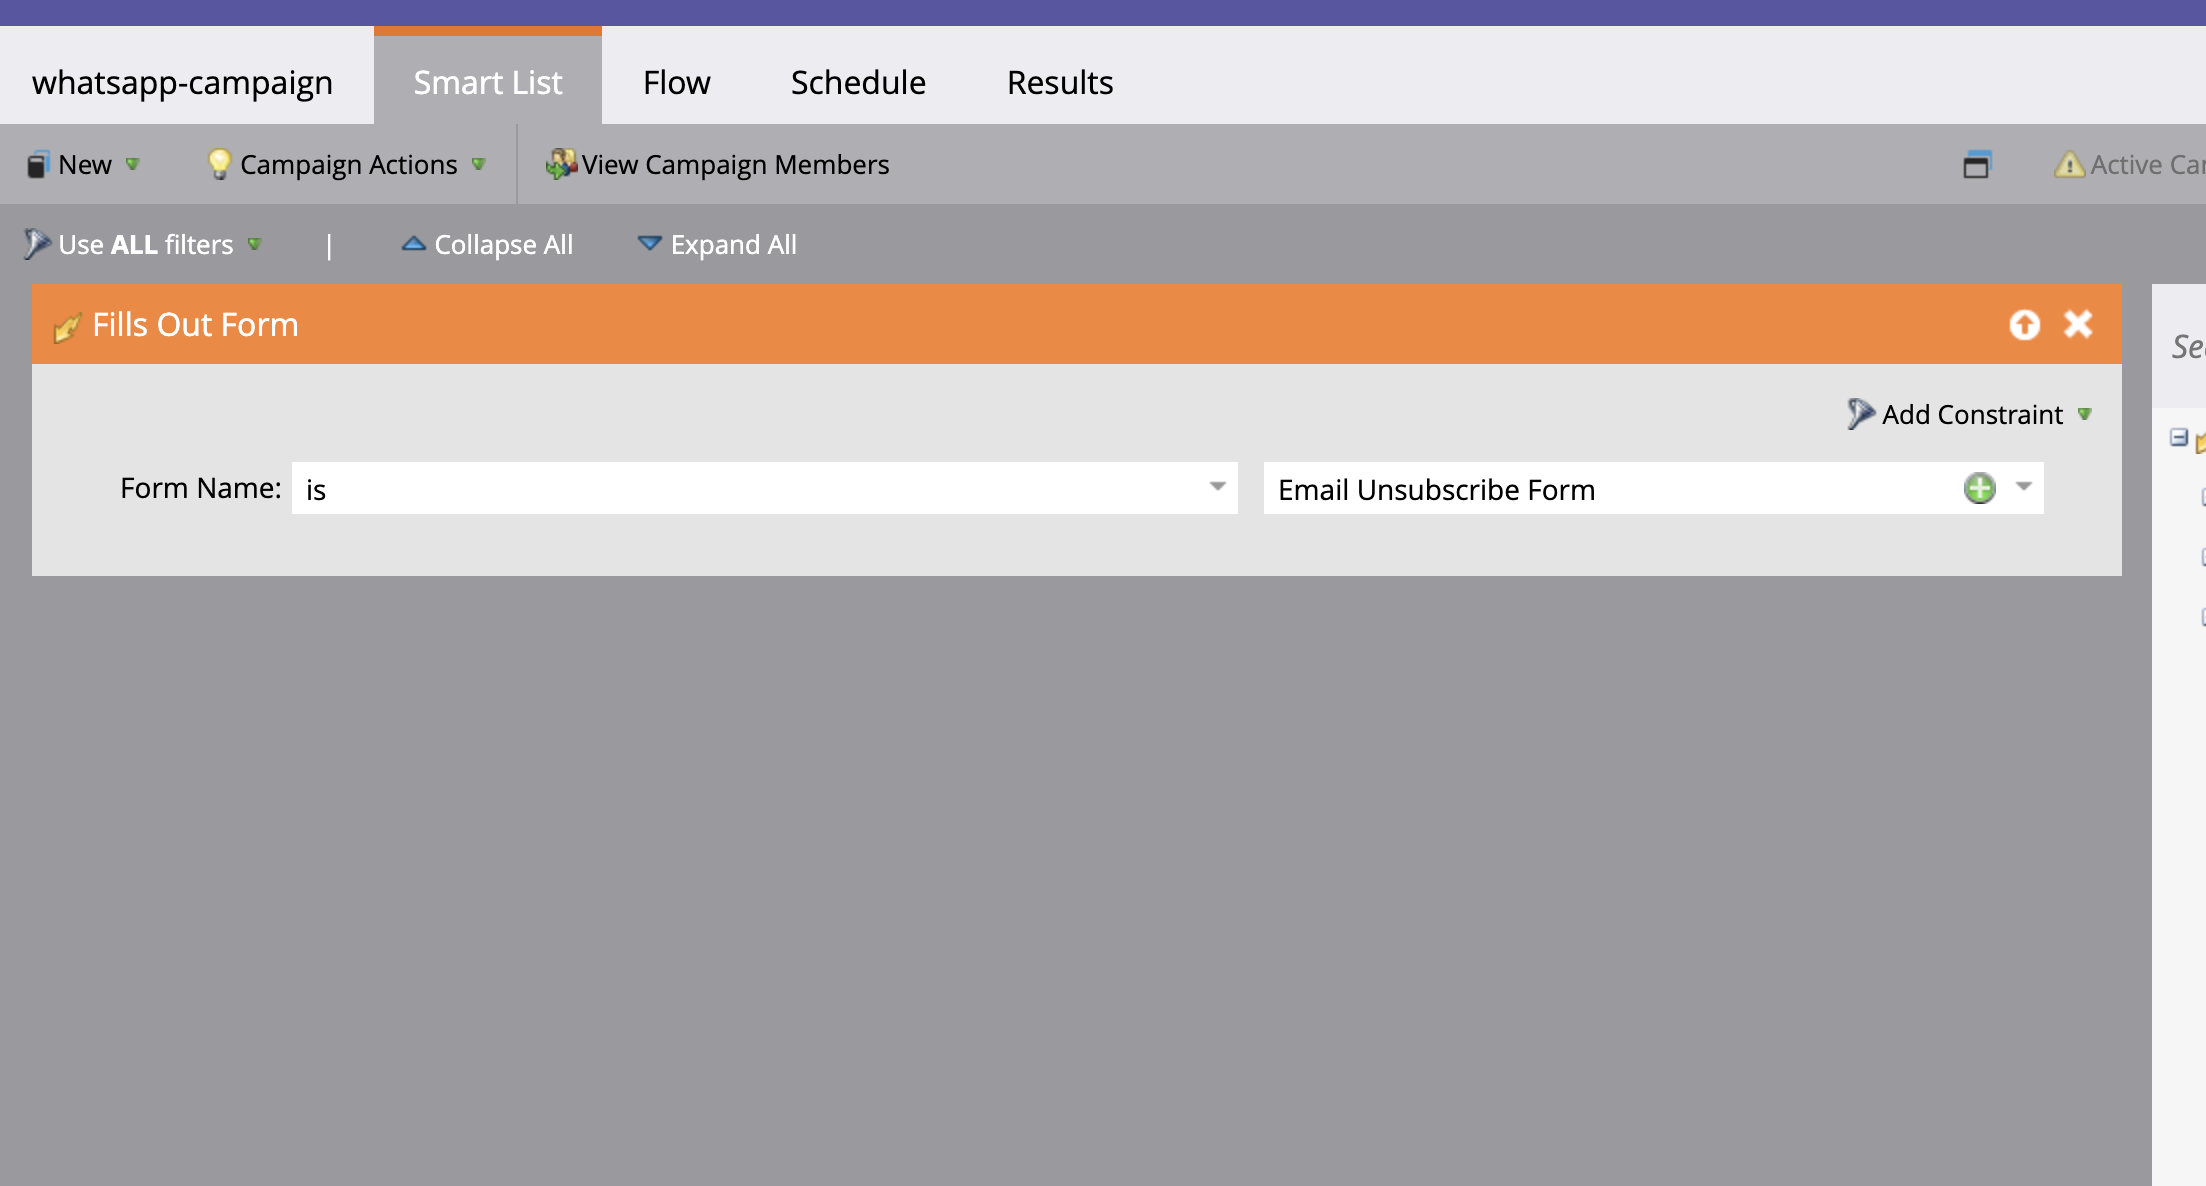
In this case, we will send a message any time a lead fills out a form we have placed on a Marketo Landing Page.
Select the Flow tab and pick the Call Webhook action.
Finally, go to the Schedule tab and activate the campaign.
Congratulations! Now visit the landing page and try out the webhook!
With this integration, you can trigger a WhatsApp/SMS message in infinite ways using Smart Campaign in Marketo.
For example, you can set up a smart list which, based on the customer preferences, send a message using either the Whatsapp trigger or SMS trigger.
Or, send a message after a scheduled time to ask for feedback to the customer.
If you want a complete guide on how to to integrate Marketo Webhook, I made a video tutorial: