How to Send SMS Messages with Python, Flask and Vonage
The Vonage SMS API is an HTTP-based API using either XML or JSON to describe how to send an SMS or understand a received SMS. Fortunately, you don't need to worry about that too much because Vonage provides a Python SDK that takes care of a lot of the underlying detail for you.
Prerequisites
Before starting, you'll want to make sure you have Python installed. The code here was tested on Python 2.7 and 3.6. If you have the choice, use Python 3.6 - it's awesome! If you're running Python 2, make sure you also have virtualenv installed.
Vonage API Account
To complete this tutorial, you will need a Vonage API account. If you don’t have one already, you can sign up today and start building with free credit. Once you have an account, you can find your API Key and API Secret at the top of the Vonage API Dashboard.
This tutorial also uses a virtual phone number. To purchase one, go to Numbers > Buy Numbers and search for one that meets your needs.
Install the Vonage Python SDK
Just to keep everything neat and tidy, let's create a virtual environment and install the Vonage Python SDK into it:
$ python3 -m venv venv # use `virtualenv venv` on Python 2
source venv/bin/activate

pip install vonage
Send an SMS from the Python REPL
Sending an SMS is so easy, let's just do it from the REPL. First, run python from the command-line, and then enter the three lines below.
>>> import vonage
>>> client = vonage.Client(key='YOUR-API-KEY', secret='YOUR-API-SECRET')
>>> client.send_message({'from': 'Vonage', 'to': 'YOUR-PHONE-NUMBER', 'text': 'Hello world'})
{'message-count': '1', 'messages': [{'to': 'YOUR-PHONE-NUMBER', 'message-id': '0D00000039FFD940', 'status': '0', 'remaining-balance': '14.62306950', 'message-price': '0.03330000', 'network': '12345'}]}
Let's just quickly recap on what those three lines did:
- The first line imported the Vonage Python SDK.
- The second line created a Vonage
Clientobject, which can be re-used, and knows your Vonage API key and the secret associated with it. - The third line actually sends the SMS message.
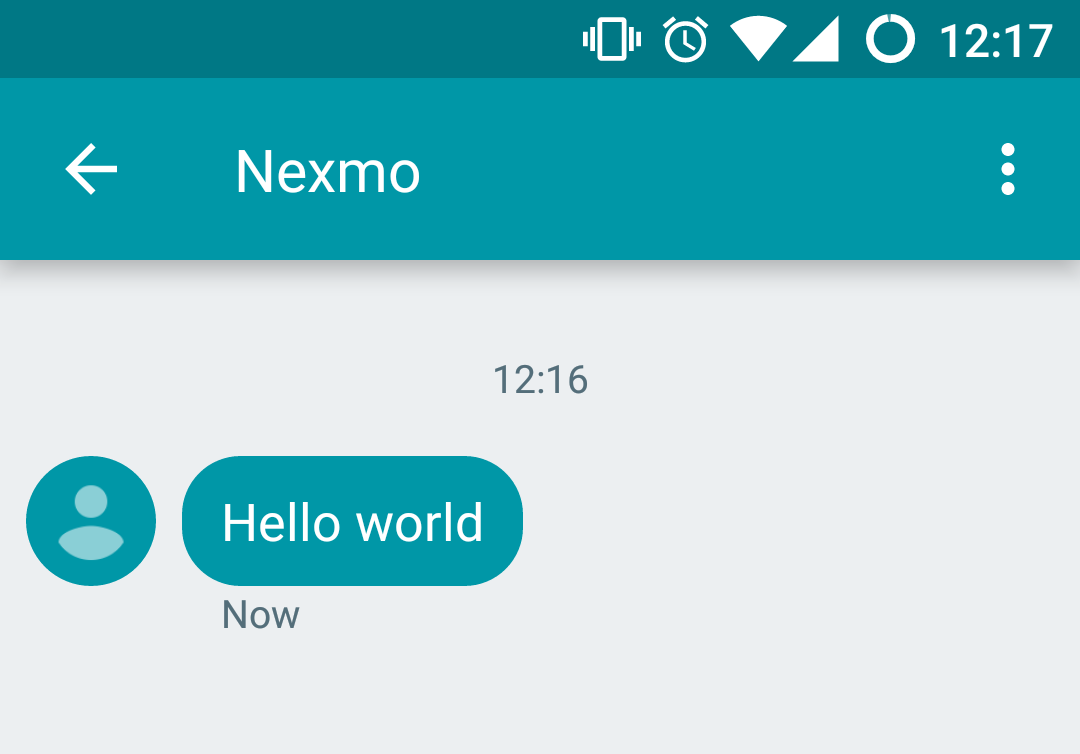
Hopefully, you received an SMS message! If not, check the contents of the response, the error messages are quite helpful.

Notice that send_message returns a dictionary, which tells you how many messages your SMS was divided into, and how much it cost you to send the message. Because the message I sent was short enough to be sent as a single SMS and it was sent within the UK, it cost me only 3.33 Euro Cents, but longer messages will need to be sent as multiple messages. Vonage will divide them up for you, and the SMS client on the phone will automatically reassemble them into the original long message, but this costs more than a short message.
Extra Credit: Build an SMS Sending Flask App
If anything, that was a bit too easy. So for extra credit, let's create a tiny web application that allows you to send an SMS message.
I'll show you how to build a small Flask app with a form for a phone number and an SMS message. When you press "Send SMS" it will post to a second view that will send the SMS using the Vonage SMS API.
Set Up Our SMS Sending Flask App
So first let's install our dependencies. I'd recommend checking out the [sample code] and running pip install -r requirements.txt. At the very least, you'll need to install Flask into your virtualenv.
So next I create a Vonage Client object and an empty Flask app. I also like to create 12-factor apps, so I'm loading in configuration from environment variables (check out the helper function in utils.py in the sample code).
The problem with loading in environment variables is that it can make running the app a little bit more difficult, so I'm using the python-dotenv library to load a .env file for me. It copies the values into the env var dictionary, so I can still get the values using getenv as I would normally.
from dotenv import load_dotenv
from flask import Flask, flash, redirect, render_template, request, url_for
import vonage

from .util import env_var, extract_error

# Load environment variables from a .env file:
load_dotenv('.env')

# Load in configuration from environment variables:
VONAGE_API_KEY = env_var('VONAGE_API_KEY')
VONAGE_API_SECRET = env_var('VONAGE_API_SECRET')
VONAGE_NUMBER = env_var('VONAGE_NUMBER')

# Create a new Vonage Client object:
vonage_client = vonage.Client(
    api_key=VONAGE_API_KEY, api_secret=VONAGE_API_SECRET
)

# Initialize Flask:
app = Flask(__name__)
app.config['SECRET_KEY'] = env_var('FLASK_SECRET_KEY')
Add a Send SMS View
Next we'll add a view that renders a Jinja2 template:
@app.route('/')
def index():
    """ A view that renders the Send SMS form. """
    return render_template('index.html')
Let's now create that template at templates/index.html. Otherwise, it won't work!
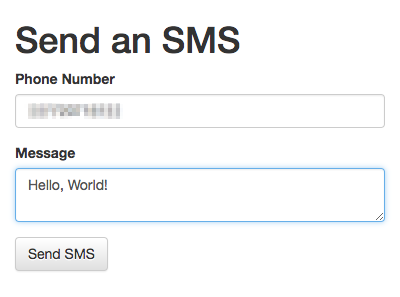
The following HTML includes the Bootstrap CSS framework and then renders a form with two fields: to_number for taking the destination phone number and message, so the user can enter their SMS message.
<h1>Send an SMS</h1>

<script src="https://maxcdn.bootstrapcdn.com/bootstrap/3.3.7/js/bootstrap.min.js" integrity="sha384-Tc5IQib027qvyjSMfHjOMaLkfuWVxZxUPnCJA7l2mCWNIpG9mGCD8wGNIcPD7Txa" crossorigin="anonymous"></script>
<div class="container">
    <h1>Send an SMS</h1>
    <form action="/send_sms" method="POST">
        <div class="form-group"><label for="destination">Phone Number</label>
            <input id="to_number" class="form-control" name="to_number" type="tel" placeholder="Phone Number" /></div>
        <div class="form-group"><label for="message">Message</label>
            <textarea id="message" class="form-control" name="message" placeholder="Your message goes here"></textarea></div>
        <button class="btn btn-default" type="submit">Send SMS</button>
    </form>
</div>
Run the Flask Server
Before you can start your server, you'll need to provide configuration in a .env file. Start with the following and fill in your details:
# Do not use this in production:
FLASK_DEBUG=true

# Replace the following with any random value you like:
FLASK_SECRET_KEY=RANDOM-STRING_CHANGE-THIS-Ea359

# Get from https://dashboard.nexmo.com/your-numbers
VONAGE_NUMBER=447700900025

# Get the following from https://dashboard.nexmo.com/settings
VONAGE_API_KEY=abcd1234
VONAGE_API_SECRET=abcdef12345678
Now start your app with:
# You may need to change the path below if your Flask app is in a different Python file:
$ FLASK_APP=smsweb/server.py flask run
* Serving Flask app "smsweb.server"
* Running on http://127.0.0.1:5000/ (Press CTRL+C to quit)
Now if you load http://localhost:5000/, you should see something like this:

Don't press "Send SMS" just yet! We haven't told Flask what to do when you submit the form, so you'll get a 404 page not found error.
Handle the Form Post
Add the following function to the bottom of your Python file, to accept the POST request from the form:
@app.route('/send_sms', methods=['POST'])
def send_sms():
    """ A POST endpoint that sends an SMS. """

    # Extract the form values:
    to_number = request.form['to_number']
    message = request.form['message']

    # Send the SMS message:
    result = vonage_client.send_message({
        'from': VONAGE_NUMBER,
        'to': to_number,
        'text': message,
    })

    # Redirect the user back to the form:
    return redirect(url_for('index'))
If your FLASK_DEBUG flag is set to true, then your changes should automatically be reloaded into the running server, so refresh your form, fill in your phone number and a message. Make sure the number is in international format without the '+' at the start. Hit "Send SMS" and check your phone!
I hope it worked for you! If not, check out the extra lines in the sample code in server.py and index.html that use Flask's flash message mechanism to report errors to the user.
And We're Done!
I hope you enjoyed this getting started guide. Stay tuned for our upcoming guide about receiving SMS messages with Python! In the meantime for more information on our APIs including inbound SMS, Voice, 2-Factor-Authentication and others, have a look at our developer portal.
Documentation
The following documentation may be useful:
