How to Send SMS Messages with Java
This post has been marked as outdated by our team. It could be that the libraries need to be updated, or that the product has changed.
This is the first in a series of "Getting Started with Vonage and Java" tutorials.
The Vonage SMS API is a service that allows you to send and receive SMS messages anywhere in the world. Vonage provides REST APIs, but it's much easier to use the Java client library we've written for you.
In this tutorial we'll cover how to send SMS messages with Java! View the source code on GitHub.
Prerequisites
Before starting, there are a few things you're going to need to have installed on your development machine. Hopefully you already have a basic understanding of Java programming - we're not going to be doing any very complicated programming, but it'll help you to get up and running. As well as a basic understanding of Java, you'll also need:
- Java SDK 1.8 or 1.7
- Gradle for building your project
Vonage API Account
To complete this tutorial, you will need a Vonage API account. If you don’t have one already, you can sign up today and start building with free credit. Once you have an account, you can find your API Key and API Secret at the top of the Vonage API Dashboard.
This tutorial also uses a virtual phone number. To purchase one, go to Numbers > Buy Numbers and search for one that meets your needs.
Using the Nexmo Client Library for Java
Now we're going to set up your Gradle project and download the Nexmo Client Library for Java.
First, create a directory to contain your project. Inside this directory, run gradle init. If you haven't used Gradle before, don't worry - we're not going to do anything too complicated! Open the file build.gradle and change the contents to the following:
// We're creating a Java Application:
apply plugin: 'application'
apply plugin: 'java'

// Download dependencies from Maven Central:
repositories {
    mavenCentral()
}

// Install the Nexmo Client library:
dependencies {
    compile 'com.nexmo:client:2.0.1'
}

// We'll create this class to contain our code:
mainClassName = "getstarted.SendSMS"
Now, if you open your console in the directory that contains this build.gradle file, you can run:
gradle build
This command will download the Nexmo client library and store it for later. If you had any source code, it would also compile that - but you haven't written any yet - so let's fix that!
Because of the mainClassName we set in your Gradle build file, you're going to need to create a class called SendSMS in the package getstarted. In production code, you'd want the package to be something like com.mycoolcompany.smstool, but this isn't production code, so getstarted will do.
Gradle uses the same directory structure as Maven, so you're going to need to create the following directory structure inside your project directory: src/main/java/getstarted.
On macOS and Linux, you can create this path by running:
mkdir -p src/main/java/getstarted
Inside the getstarted directory, create a file called SendSMS.java, open it in your favourite text editor, and we'll start with some boiler-plate code:
package getstarted;

import com.nexmo.client.NexmoClient;
import com.nexmo.client.auth.AuthMethod;
import com.nexmo.client.auth.TokenAuthMethod;
import com.nexmo.client.sms.SmsSubmissionResult;
import com.nexmo.client.sms.messages.TextMessage;

public class SendSMS {

    public static void main(String[] args) throws Exception {
        // Our code will go here!
    }
}
All this does is import the necessary parts of the Nexmo client library, and create a method to contain our code. It's worth running gradle run now, which should run your main method. It won't do anything yet, but this is where we get to the interesting bit.
Send SMS Messages with Java
Put the following in your main method:
AuthMethod auth = new TokenAuthMethod(API_KEY, API_SECRET);
NexmoClient client = new NexmoClient(auth);
Fill in API_KEY and API_SECRET with the values you copied from the Vonage API Dashboard. This code creates a NexmoClient object that can be used to send SMS messages. You will need to provide other AuthMethods to be able to make voice calls, but I'll cover that in another blog post. Now we have a configured client object, we can send an SMS message:
TextMessage message = new TextMessage(FROM_NUMBER, TO_NUMBER, "Hello from Nexmo!");
SmsSubmissionResult[] responses = client.getSmsClient().submitMessage(message);
for (SmsSubmissionResult response : responses) {
    System.out.println(response);
}
Again, you'll want to replace FROM_NUMBER and TO_NUMBER with strings containing the virtual number you bought, and your own mobile phone number. Once you've done that, save and run gradle run again. You should see something like this printed to the screen:
SMS-SUBMIT-RESULT -- STATUS:0 ERR:null DEST:4412341234 MSG-ID:0C0000002D9C9A89 CLIENT-REF:null PRICE:0.0333000
... and you should receive a text message! If it didn't work, check out if something was printed after ERR: in the line above, and maybe wait a few more seconds for the message to appear.
So you just learned how to send an SMS message with Vonage! You can either stop there, or for bonus points, we can build a Web service around it, which will be useful in the next post where we'll be writing a webhook to receieve SMS messages sent to your virtual number.
Building a Web Service to Send SMS
We're going to build a tiny HTTP service and then test it with Postman. Fortunately Gradle makes this quite easy. Open your build.gradle and add the following to the top:
apply plugin: 'war'
apply from: 'https://raw.github.com/akhikhl/gretty/master/pluginScripts/gretty.plugin'
The first line tells Gradle it should build a war file, using source files in src/main/java and src/main/webapp. The second line adds the ability to fire up your webapp straight from Gradle using the Jetty servlet container!
I'm going to suggest you run gradle appRun now (note that you use appRun and not run to run the web server!) It'll take a while the first time, while it downloads some dependencies.
Eventually, you should see something like this:
11:11:59 INFO  Jetty 9.2.15.v20160210 started and listening on port 8080
11:11:59 INFO  project runs at:
11:11:59 INFO    http://localhost:8080/project
Press any key to stop the server.
<===========--> 87% EXECUTING
> :appRun
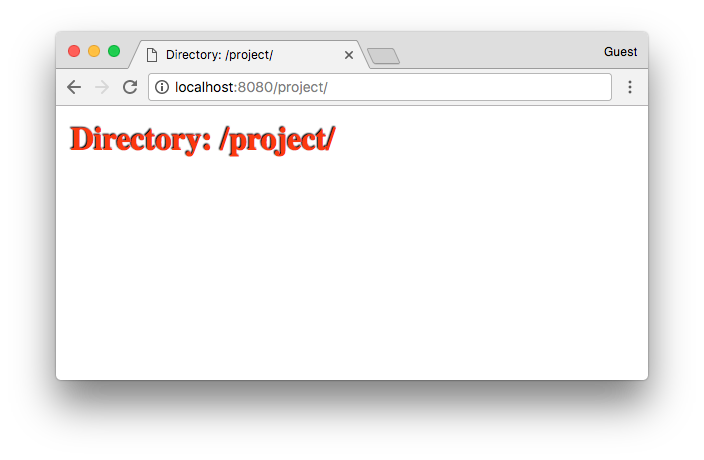
This means Jetty is now running your (empty) web service. Fire up the URL you see, to check it's running OK. It should look a bit like this:

Now let's write a servlet! Create a file called src/main/java/getstarted/SendSMSServlet.java. It's going to look similar to our last class:
public class SendSMSServlet extends HttpServlet {
    private String FROM_NUMBER;
    private NexmoClient client;

    public void init(ServletConfig config) {
        // Load configuration from the servlet container:
        FROM_NUMBER = config.getInitParameter("from_number");
        String api_key = config.getInitParameter("api_key");
        String api_secret = config.getInitParameter("api_secret");

        client = new NexmoClient(new TokenAuthMethod(api_key, api_secret));
    }

    protected void doPost(HttpServletRequest req,
                      HttpServletResponse resp)
               throws ServletException,
                      java.io.IOException {
        try {
            // Extract form parameters from the request:
            String to_number = req.getParameter("to");
            String message = req.getParameter("message");

            SmsSubmissionResult[] responses = client.getSmsClient().submitMessage(
                new TextMessage(FROM_NUMBER, to_number, message));
            for (SmsSubmissionResult response : responses) {
                resp.getWriter().println(response);
            }
        } catch (NexmoClientException nce) {
            throw new ServletException(nce);
        }
    }
}
And then we need to configure the servlet in our servlet container by creating the following at src/main/webapp/WEB-INF/web.xml:
<web-app>
    <servlet>
        <servlet-name>send-sms</servlet-name>
        <servlet-class>getstarted.SendSMSServlet</servlet-class>
        <init-param>
            <param-name>from_number</param-name>
            <param-value>YOUR_NEXMO_NUMBER</param-value>
        </init-param>
        <init-param>
            <param-name>api_key</param-name>
            <param-value>YOUR_API_KEY</param-value>
        </init-param>
        <init-param>
            <param-name>api_secret</param-name>
            <param-value>YOUR_API_SECRET</param-value>
        </init-param>
    </servlet>
    <servlet-mapping>
        <servlet-name>send-sms</servlet-name>
        <url-pattern>/*</url-pattern>
    </servlet-mapping>
</web-app>
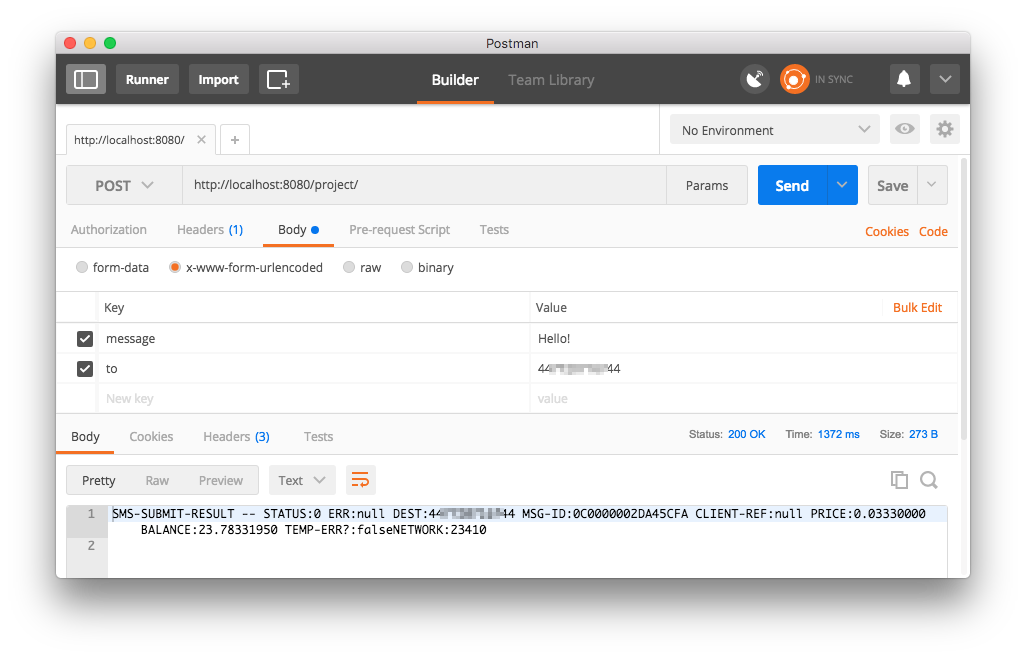
Replace the placeholders with your own values, and then run gradle appRun. If everything builds correctly, let's fire up Postman and make a POST request, like this:

I hope it worked! So now you've built a REST Web service for sending SMS messages! In reality, there's lots more things you'd want to do before deploying this, like adding authentication (otherwise anyone could send a message using your Vonage API account!), a nice Web form for posting to the service, and improving the error handling - but this is a good start!
So far we've learned how to send SMS messages with Java. In the next post, we'll extend this service to receive SMS messages sent to your virtual number.
