How to Receive SMS Messages with Node.js and Express
A newer version of this post now exists. It could be that the libraries need to be updated, or that the product has changed. Please click here to view it.
This is the second article in a series of “Getting Started with Vonage and Node.js” tutorials.
In the previous article, you set up your Vonage account and learned how to send SMS messages with Node.js. In this article, you will learn about receiving an inbound SMS by implementing a webhook endpoint in Node.js using Express.
View the source code on GitHub
Defining a Webhook Endpoint
In order to receive an SMS from Vonage you need to associate a webhook endpoint (URL) with a virtual number that you have rented from Vonage. Inbound Messages to that number are then sent to your webhook endpoint.
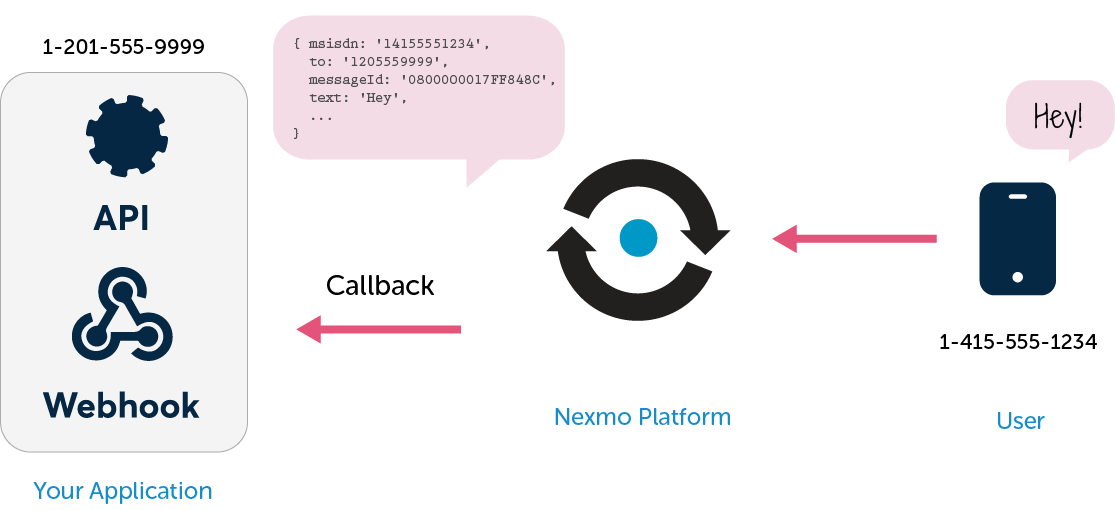
While you are developing the webhook endpoint, it is a pain to keep deploying your work in progress. To make your life easier, let’s use ngrok to expose your webhook endpoint on your local machine as a public URL!
Using ngrok
First, download ngrok from https://ngrok.com. Once installed, run ngrok on terminal:
$ ngrok http 3000

Your local server (localhost:3000) now has a ngrok URL, https://71f03962.ngrok.io that can be used as your webhook endpoint during development (also, notice the Web Interface URL - I will explain it later!).
Setting the Webhook Endpoint With Vonage
Sign in to your Vonage account, and go to Settings. Scroll all way down to API Settings and fill out the Callback URL for Inbound Message with the ngrok URL with a route, let’s call it inbound, enter https://71f03962.ngrok.io/inbound, and let's set the HTTP Method to POST then save.
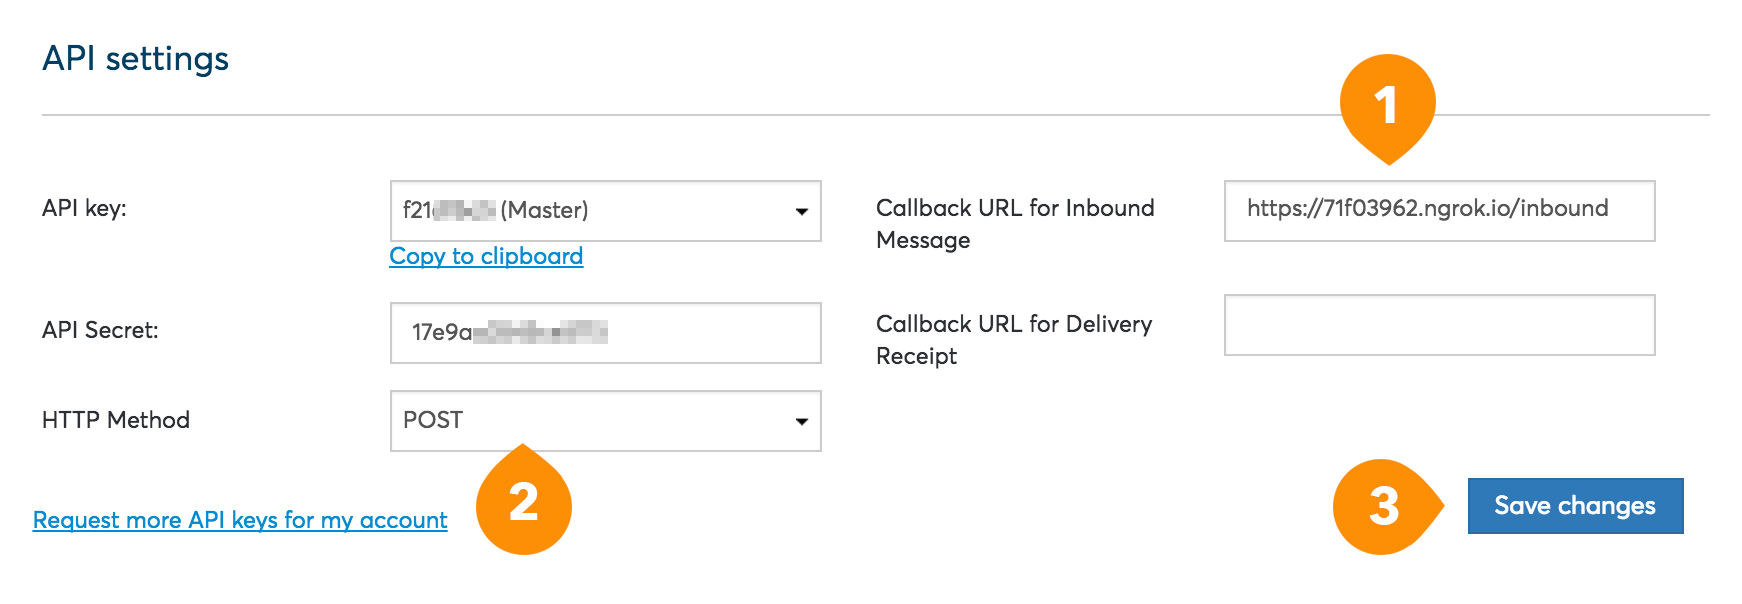
Now all your incoming messages will go to the webhook (callback) URL, so let’s write some code with Node.js and Express!
Note: Above we're setting the webhook endpoint for SMS at an account level. But you can also set up unique webhook endpoints for each virtual number.
Writing Webhook Endpoints With Express
Now, handle the POST requests with Express, so you will also need to install body-parser.
$ npm install express body-parser --save
Create a .js file, and instantiate express and listen the server to port 3000. Because you have set your ngrok to expose localhost:3000, you must stick with the same port.
'use strict';
const express = require('express');
const bodyParser = require('body-parser');
const app = express();
app.use(bodyParser.json());
app.use(bodyParser.urlencoded({ extended: true }));

const server = app.listen(3000, () => {
  console.log('Express server listening on port %d in %s mode', server.address().port, app.settings.env);
});
Now, create a HTTP POST route to handle the requests:
app.post('/inbound', (req, res) => {
  handleParams(req.body, res);
});
Then define the handleParams function:
function handleParams(params, res) {
  if (!params.to || !params.msisdn) {
    console.log('This is not a valid inbound SMS message!');
  } else {
    console.log('Success');
    let incomingData = {
      messageId: params.messageId,
      from: params.msisdn,
      text: params.text,
      type: params.type,
      timestamp: params['message-timestamp']
    };
    res.send(incomingData);
  }
  res.status(200).end();
}
Let's run the node code, and try sending some messages from your phone to your virtual number!
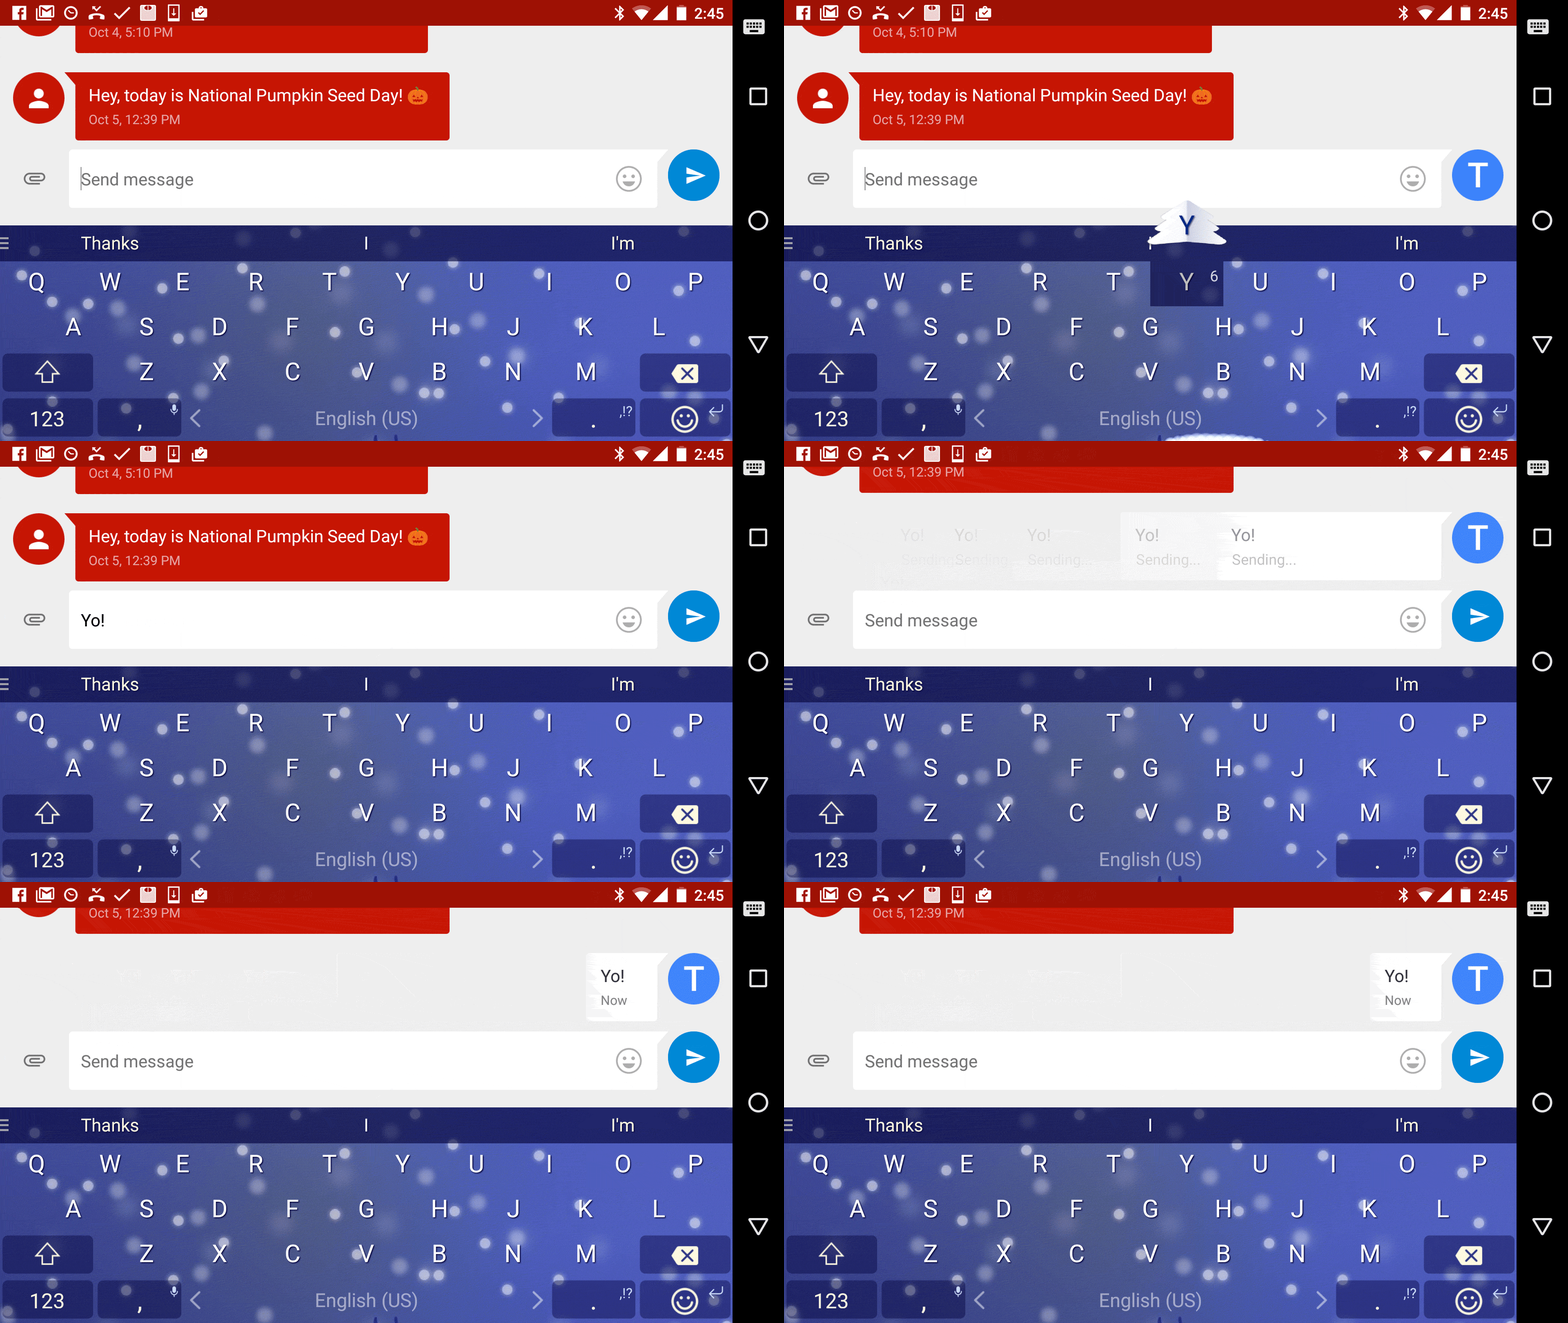
When you are tunneling your local app with ngrok, you can also inspect the request at http://127.0.0.1:4040/ on your browser:
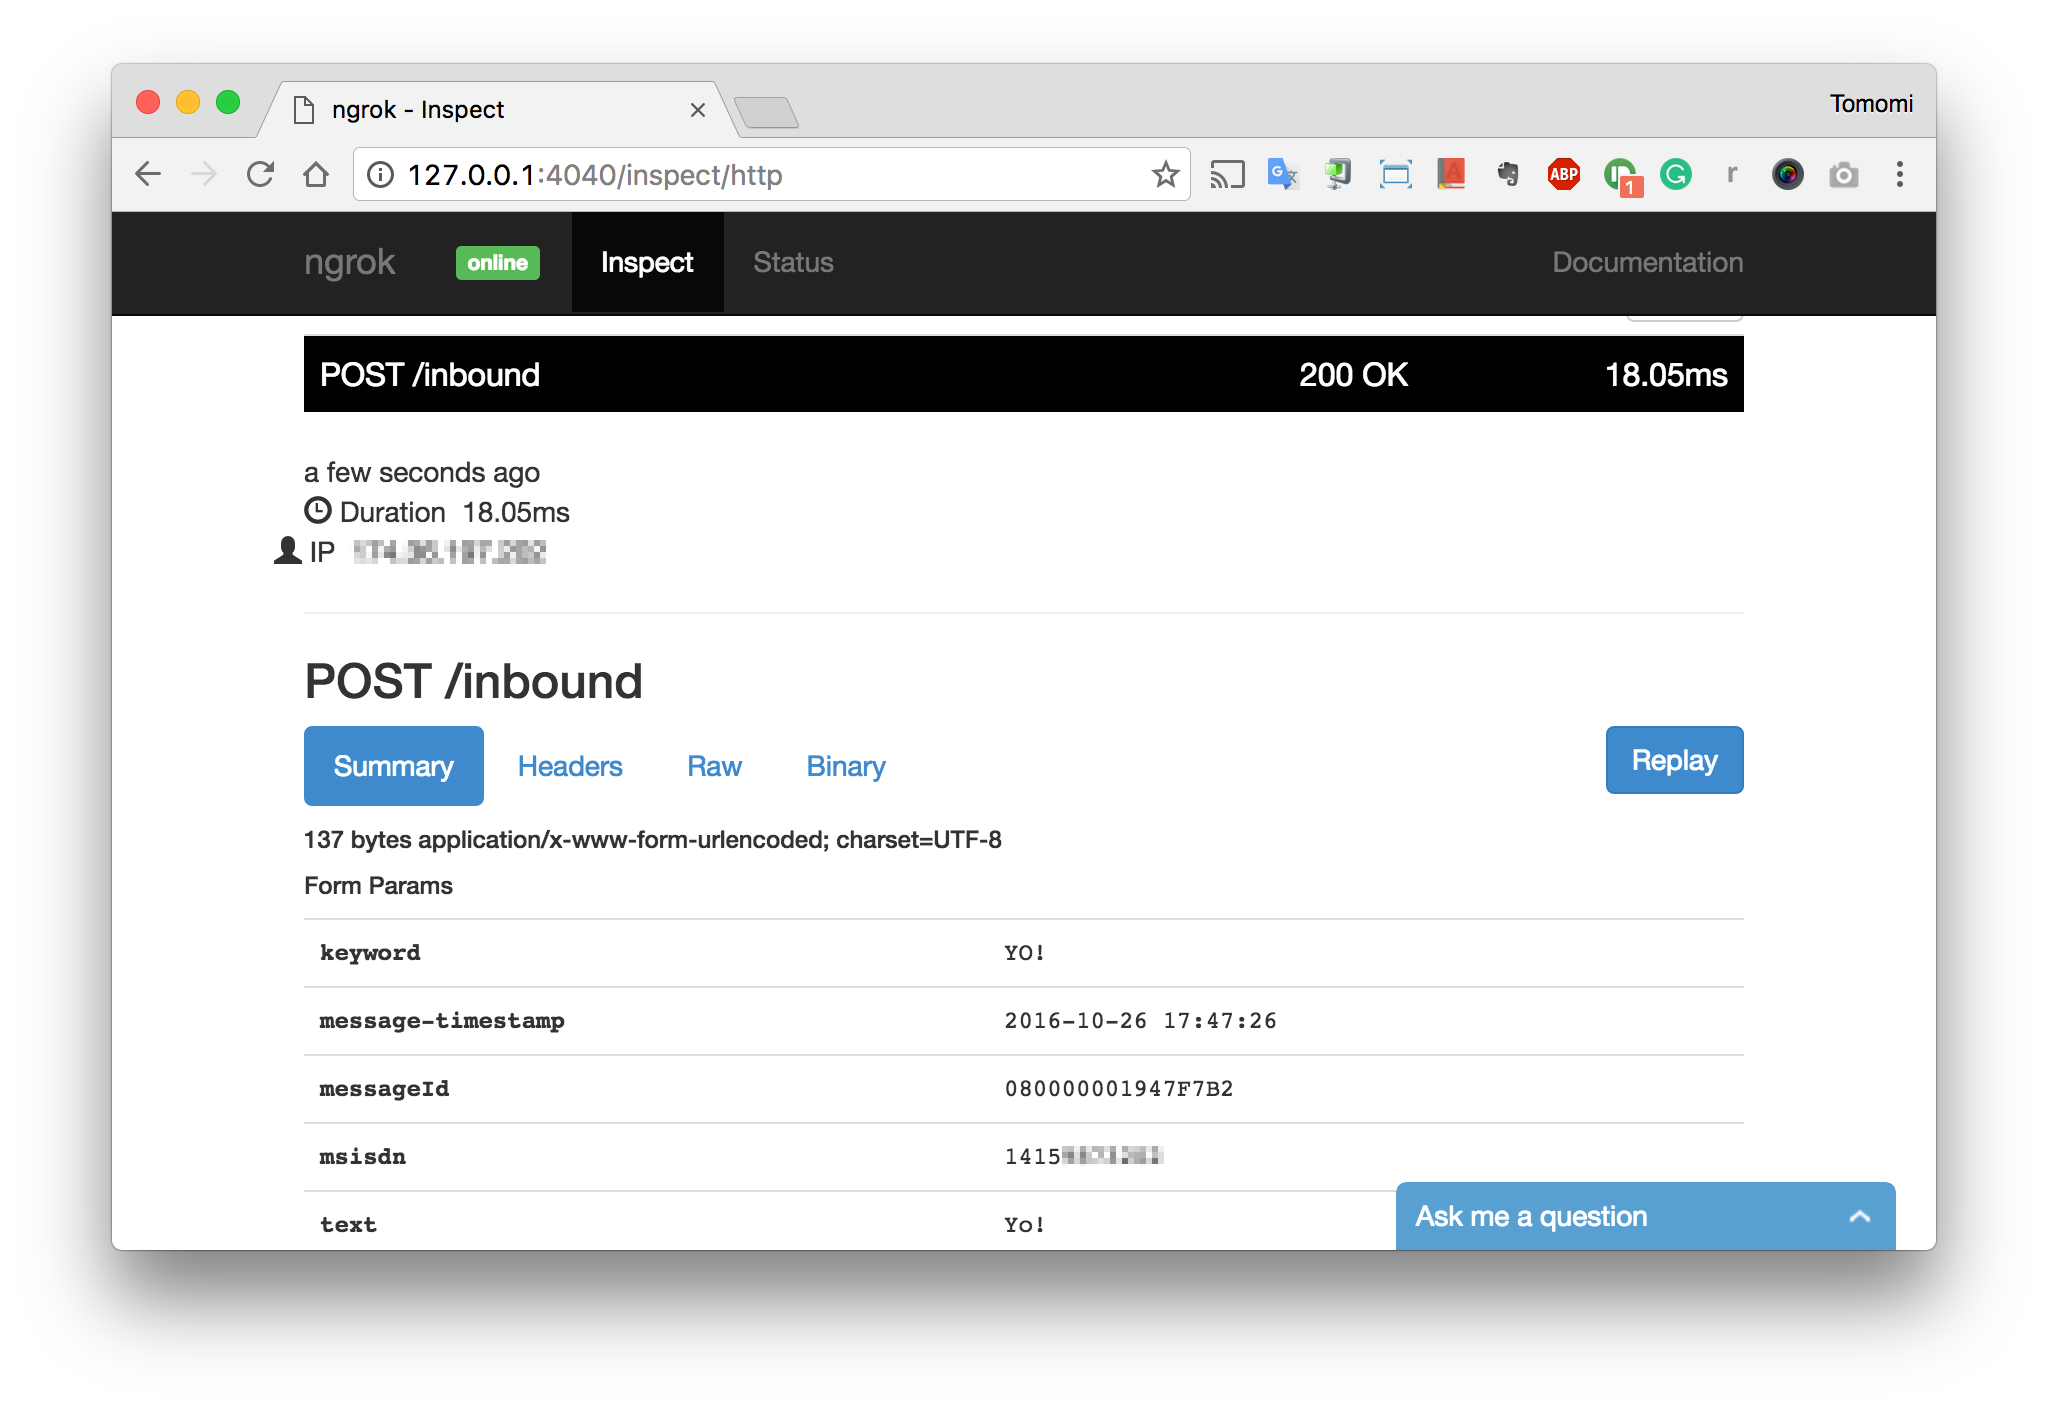
Voilà, now you can see your SMS message has been sent, Vonage has received the message and passed it on to your express application via a webhook!
If you take a look at the code sample in GitHub, you will notice the extra example - a persist data storage (like the HTML5 Local Storage, but for Node) and the incoming data is stored with each key (message ID) and values. That way, you can set up a /inbound/:id route parameter as named URL segment. For instance, when you access http://localhost:3000/inbound/080000001947F7B2, it returns:
{"messageId":"080000001947F7B2","from":"14159873202","text":"Yo!","type":"text","timestamp":"2016-10-26 17:47:26"}
In reality, you should set up a real DB, rather than the data storage.
I hope you find this useful. Let me know, I'm @girlie_mac on Twitter.
References
- Vonage SMS API https://docs.nexmo.com/messaging/sms-api
- Vonage Webhooks https://developer.nexmo.com/messaging/sms/overview
- Ngrok https://ngrok.com/